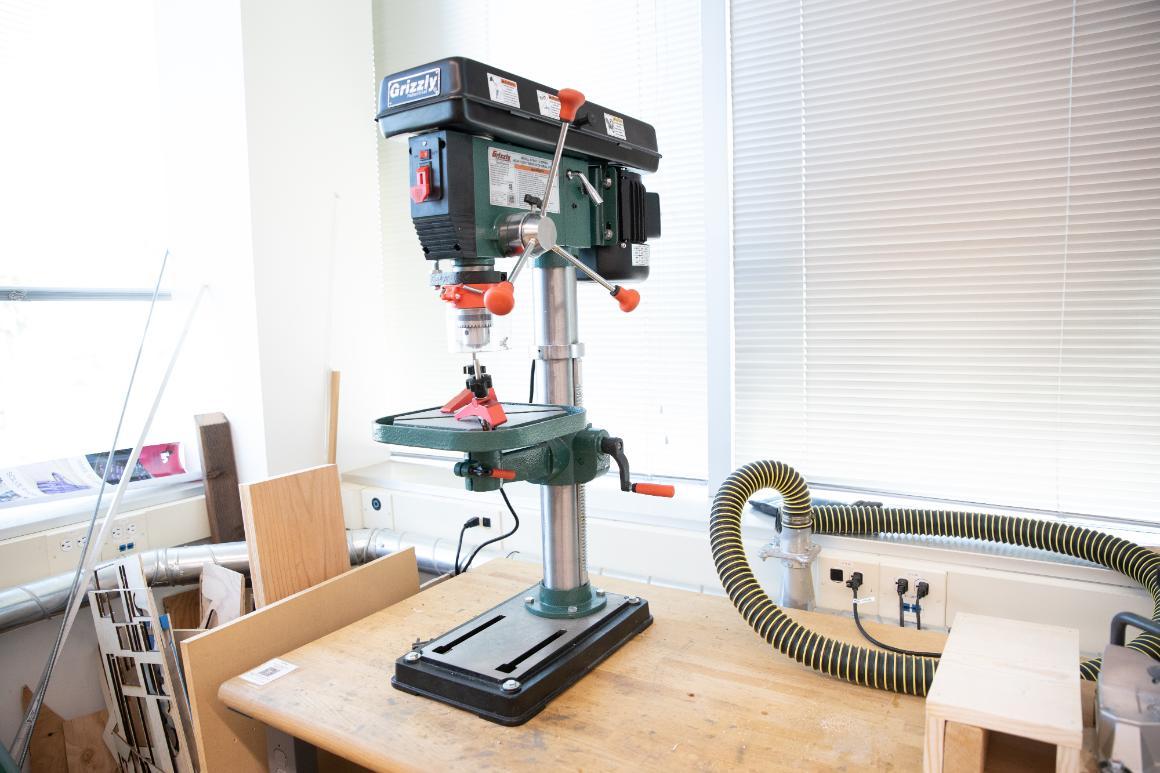
Whether you’re a **beginner** or a seasoned **professional,** learning **how to use a drill press** is a **valuable skill**. From accurate drilling to ensuring project consistency, this tool is indispensable in any workshop.
The **how to use drill press** offers precision and efficiency. It’s important to understand its components, use them correctly, and maintain your machinery to ensure longevity and safety.

Getting Started with Your Drill Press
Understanding the Components
Before diving into the process, get familiar with the parts of your **drill press**. Here are the main components:
- The Base: Provides stability and support to the entire machine.
- Column: The vertical part supporting the head and the spindle.
- Head: Houses the motor, pulleys, and spindle.
- Table: The platform where materials are placed for drilling.
- Spindle: Rotates the drill bit and is powered by the motor.
Safety Precautions
Safety is paramount when using a **drill press**. Follow these guidelines:
- Always wear **safety goggles** to protect your eyes from debris.
- Ensure the workspace is clean and free of obstructions.
- Tightly secure the material to the table to avoid movement.
- Never wear loose clothing that could get caught in the drill.
Setting Up the Drill Press
Choosing the Right Drill Bit
Select the appropriate drill bit based on the material you are working with.
- **High-Speed Steel (HSS) Bits**: Great for general-purpose drilling in wood, plastic, and metal.
- **Carbide-Tipped Bits**: Ideal for drilling into hard materials like stainless steel.
- **Brad-Point Bits**: Perfect for woodworking due to their sharp center point.
Adjusting the Speed
The speed of the **drill press** can be adjusted by changing the position of the **belt and pulleys**. **Higher speeds** are suitable for softer materials, while **lower speeds** work best for harder materials.
Trade of Machinists offers more extensive guidelines.
Operating the Drill Press
Securing the Workpiece
Properly securing the workpiece is crucial for **accurate drilling**.
- Use **clamps** to hold the material in place.
- Ensure the material is positioned accurately under the drill bit.
Drilling the Hole
With the material secured and the correct **drill bit** in place, you can start drilling.
- Turn on the **drill press**.
- Lower the spindle using the **feed lever** until the drill bit makes contact with the material.
- Apply steady pressure to drill the hole.
- Once the hole is drilled, slowly raise the spindle and turn off the machine.
Maintenance and Care
Cleaning the Drill Press
Regular cleaning is essential to maintain the performance of your **drill press**.
- Wipe down the entire machine with a dry cloth.
- Use a brush to remove debris from the table and base.
Lubrication
Lubricate the moving parts to ensure smooth operation.
- Apply **machine oil** to the spindle.
- Check the **belt and pulleys** for wear and tear.
Advanced Techniques
Using Jigs and Fixtures
Jigs and fixtures can enhance the functionality of your **drill press**. They allow for greater precision and repeatability.
Troubleshooting Common Issues
Bit Slippage
If the drill bit slips, tighten the chuck securely.
Excessive Vibration
Excessive vibration can result from an unstable base or an unbalanced drill bit. Ensure both are secure and balanced.
Learn more about maintaining stability from paint and coating.

FAQs
What is the primary use of a drill press?
A drill press is primarily used for drilling precise holes in a variety of materials including wood, metal, and plastic.
How do I maintain the efficiency of my drill press?
Regular cleaning, proper lubrication, and ensuring all components are tightly secured will help maintain the efficiency of your **drill press**.
Can I use a drill press for tasks other than drilling?
Yes, with the right attachments and jigs, a **drill press** can be used for tasks like sanding and mortising.
For further insights, refer to the detailed description at genetic analysis or specific operations on wafer polishing.