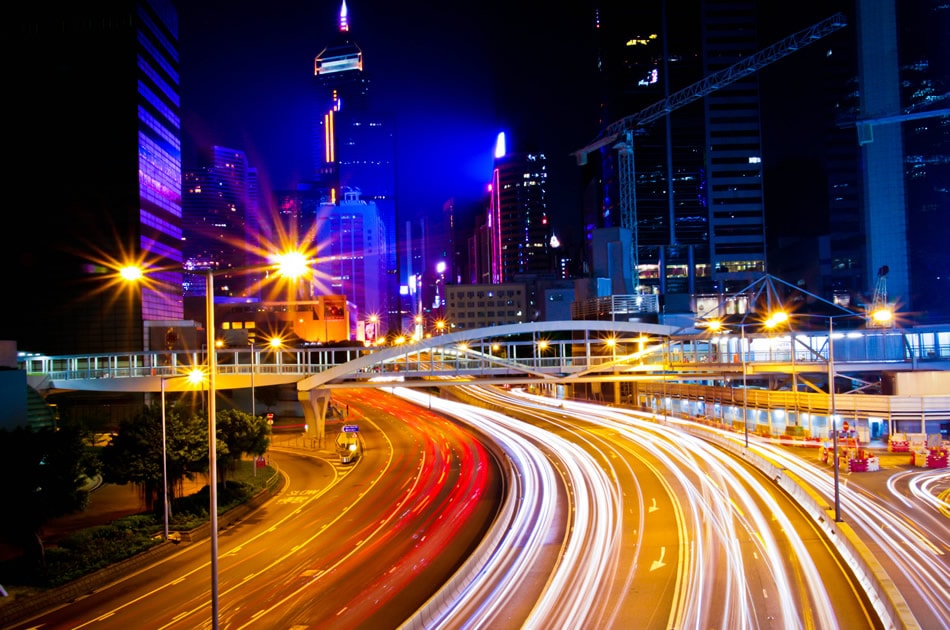
Capturing the sense of speed and movement in bicycle images can transform a static scene into a dynamic visual story. Motion blur bicycle photography is a creative approach that emphasizes the energy and flow of cyclists, making your photos stand out with a sense of action. Whether you’re photographing a fast-paced race or a leisurely ride through the city, understanding how to use motion blur effectively will help you create images that are both artistic and technically impressive.
This guide covers the essential techniques, camera settings, and creative ideas for producing compelling bicycle images with motion blur. You’ll also find practical advice for working in different lighting conditions and environments, plus tips for refining your skills as you experiment with this popular style. For those interested in exploring related techniques, you might also enjoy the motion blur car light trails tutorial for inspiration on capturing movement in other contexts.
Understanding Motion Blur in Bicycle Photography
At its core, motion blur bicycle photography involves intentionally allowing moving subjects or backgrounds to blur during exposure. This effect is achieved by using slower shutter speeds, which record the movement of the cyclist, the wheels, or even the background as streaks or soft trails. The result is a photograph that conveys speed, direction, and excitement—qualities that are often missing from sharply frozen action shots.
The key to success is balancing blur with sharpness. Typically, photographers aim to keep at least part of the subject—such as the rider’s face or the bike frame—relatively crisp, while the rest of the image shows motion. This contrast draws the viewer’s eye and creates a focal point within the dynamic scene.
Essential Camera Settings for Capturing Motion
To achieve the desired blur effect, you’ll need to adjust your camera settings thoughtfully. Here are the main factors to consider:
- Shutter Speed: The most critical setting for motion blur. Start with shutter speeds between 1/15 and 1/60 of a second. The exact value depends on the speed of the cyclist and the amount of blur you want. Slower speeds create more pronounced trails, while slightly faster speeds maintain more detail.
- Aperture: Use a smaller aperture (higher f-number) to compensate for the extra light entering during a longer exposure. This also increases your depth of field, helping keep more of the scene in focus.
- ISO: Set your ISO as low as possible to minimize noise, especially in bright conditions. In low light, you may need to increase ISO, but be mindful of grain.
- Focus Mode: Continuous autofocus (AI Servo or AF-C) helps track moving cyclists, ensuring the sharpest part of your image stays in focus.
Experiment with these settings to find the right balance for your scene. Many cameras also offer shutter priority mode (Tv or S), which lets you set the shutter speed while the camera adjusts aperture automatically.
Techniques for Dynamic Cycling Images
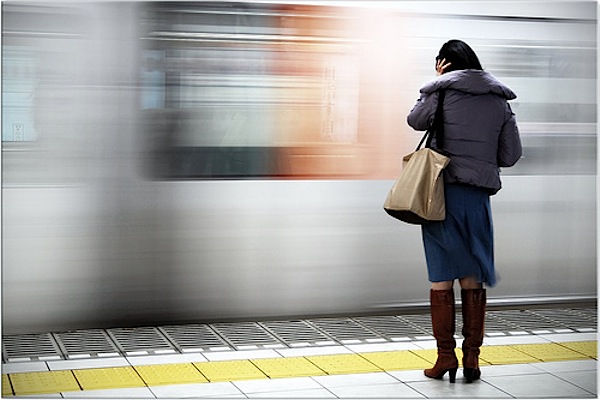
There are several creative methods to add motion blur to your bicycle shots. The most popular is panning: following the cyclist with your camera as they move past. This keeps the rider relatively sharp while blurring the background, emphasizing speed and direction.
- Panning: Stand parallel to the cyclist’s path. As they approach, lock focus and smoothly move your camera in sync with their motion. Press the shutter while continuing to pan. Practice is key—try different shutter speeds and follow-throughs for best results.
- Static Camera, Moving Subject: Keep your camera still and let the cyclist move through the frame. This technique blurs the rider and wheels, creating a dreamy, abstract effect.
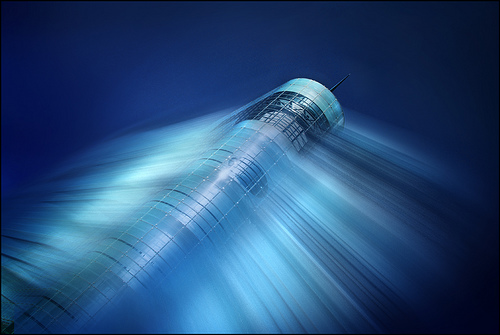
- Intentional Camera Movement (ICM): Move your camera deliberately during exposure. This can create artistic streaks and patterns, especially if you combine it with colorful backgrounds or lights. For more on this approach, see the motion blur with moving camera guide.
Choosing the Right Environment and Lighting
The setting you choose can greatly influence your results. Urban streets, parks, and cycling tracks all offer unique backgrounds and lighting conditions. Early morning and late afternoon provide softer, directional light, which helps highlight the movement and adds depth to your images.
Overcast days are ideal for motion blur, as the diffused light reduces harsh shadows and blown highlights. If shooting in bright sunlight, consider using a neutral density (ND) filter to allow for slower shutter speeds without overexposing your image.
Backgrounds with strong lines, colorful elements, or interesting textures enhance the blur effect. Try positioning yourself so that the cyclist moves across these features, creating dynamic streaks and patterns in your photos.
Creative Ideas and Advanced Tips
Once you’re comfortable with the basics, experiment with more advanced techniques:
- Multiple Exposures: Some cameras allow you to combine several exposures in a single frame, layering different moments of movement for a surreal effect.
- Flash with Slow Shutter: Using a flash at the end of a long exposure (rear curtain sync) can freeze the cyclist sharply while leaving a trail of motion behind them.
- Low-Angle Shots: Shooting from ground level emphasizes speed and adds drama to your composition.
- Experiment with Color: Vibrant clothing, bikes, or backgrounds can make the blur more visually striking.
As you refine your approach, review your images to see which combinations of settings and techniques produce the most compelling results. Don’t hesitate to try new ideas or revisit locations at different times of day for fresh perspectives.
Common Challenges and How to Overcome Them
Even experienced photographers face challenges when working with motion blur. Here are some common issues and solutions:
- Unwanted Camera Shake: Use a tripod or monopod for added stability, or brace yourself against a solid object. Image stabilization features can also help.
- Missed Focus: Pre-focus on a spot where the cyclist will pass, or use continuous autofocus to track the subject.
- Overexposure: Lower your ISO, use a smaller aperture, or add an ND filter to control light during long exposures.
- Too Much or Too Little Blur: Adjust your shutter speed incrementally and review your results after each shot to dial in the perfect amount of motion.
Remember, practice and patience are crucial. Each scene and subject will require slight adjustments, so keep experimenting and learning from each session.
Further Learning and Inspiration
If you’re interested in expanding your skills beyond cycling, there are many related resources available. For example, the motion blur with moving subject article explores techniques for a variety of fast-moving scenes. You can also learn about the connection between motion blur and human vision, or discover how to apply these effects in digital art with the motion blur effect in graphic design guide.
For a comprehensive overview of motion techniques in photography, the mastering motion blur photography resource provides additional insights and examples.
FAQ: Motion Blur in Bicycle Photography
What shutter speed should I use for motion blur with bicycles?
A good starting point is between 1/15 and 1/60 of a second. The ideal speed depends on how fast the cyclist is moving and the amount of blur you want. Experiment with different settings to achieve the effect you prefer.
How do I keep the cyclist sharp while blurring the background?
Use the panning technique: follow the cyclist with your camera as they move, matching their speed. This keeps the rider relatively sharp while the background becomes streaked with motion.
Can I create motion blur in bright daylight?
Yes, but you may need to use a neutral density (ND) filter to reduce the amount of light entering the lens. This allows you to use slower shutter speeds without overexposing your image.