Capturing motion blur on iPhone camera can add a sense of energy, speed, and creativity to your photos. While DSLRs and mirrorless cameras have long offered manual controls for this effect, modern iPhones—especially with the right techniques and apps—can also create striking blurred motion shots. Whether you want to photograph flowing water, moving cars, or dynamic street scenes, learning to achieve this look with your iPhone opens up new artistic possibilities.
In this article, you’ll discover practical steps for creating motion blur with your iPhone, including recommended settings, app suggestions, and tips for different scenarios. We’ll also clarify the differences between motion blur and similar effects, so you can get the results you want.
For a deeper understanding of how motion blur differs from other camera effects, check out this helpful guide on motion blur vs camera shake.
Understanding Motion Blur in Mobile Photography
Motion blur occurs when a moving subject or the camera itself moves during exposure, causing parts of the image to appear streaked or soft. This effect can be intentional for artistic impact or accidental due to camera shake. On iPhones, achieving this look requires a combination of slow shutter speeds and stable shooting conditions.
The iPhone’s default Camera app is designed to minimize blur, especially in low light. However, with the right approach, you can override these settings and capture the dynamic movement you want.
Essential Tools for Creating Motion Blur on iPhone Camera
To get started, you’ll need a few key tools and apps. Here’s what helps most photographers achieve smooth, controlled blur:
- Tripod or Stable Surface: Prevents unwanted shake so only the moving subject is blurred.
- Third-Party Camera Apps: Apps like Slow Shutter Cam, ProCam, or Camera+ 2 allow manual control over shutter speed.
- ND Filter (Optional): A neutral density filter can help reduce light, making it easier to use longer exposures in daylight.
Step-by-Step Guide: Capturing Blurred Motion with Your iPhone
1. Choose the Right App
The built-in Camera app on most iPhones doesn’t allow manual shutter speed adjustments. To create motion blur with your iPhone, download a third-party app that offers manual controls. Popular choices include:
- Slow Shutter Cam
- ProCam
- Camera+ 2
These apps let you select longer exposure times, which are crucial for capturing movement.
2. Stabilize Your Device
Place your iPhone on a tripod or a steady surface. Even slight hand movements can cause unwanted blur across the entire image. A tripod ensures that only the moving elements in your frame are blurred, while the rest remains sharp.
3. Set the Shutter Speed
In your chosen app, select a slow shutter speed—typically between 1/4 second and several seconds, depending on how fast your subject is moving. For fast-moving traffic, a shorter exposure (1/4 to 1 second) often works well. For flowing water or light trails, try longer exposures (2–10 seconds).
4. Adjust ISO and Exposure
Lower the ISO setting to reduce noise, especially in longer exposures. If shooting in bright conditions, decrease the exposure or use an ND filter to avoid overexposure.
5. Compose and Shoot
Frame your shot, tap to focus, and trigger the shutter. If your app supports it, use a timer or remote shutter to avoid shaking the phone when pressing the button.
Creative Ideas for Using Motion Blur on Your iPhone
Once you’ve mastered the basics, try these creative approaches to make your images stand out:
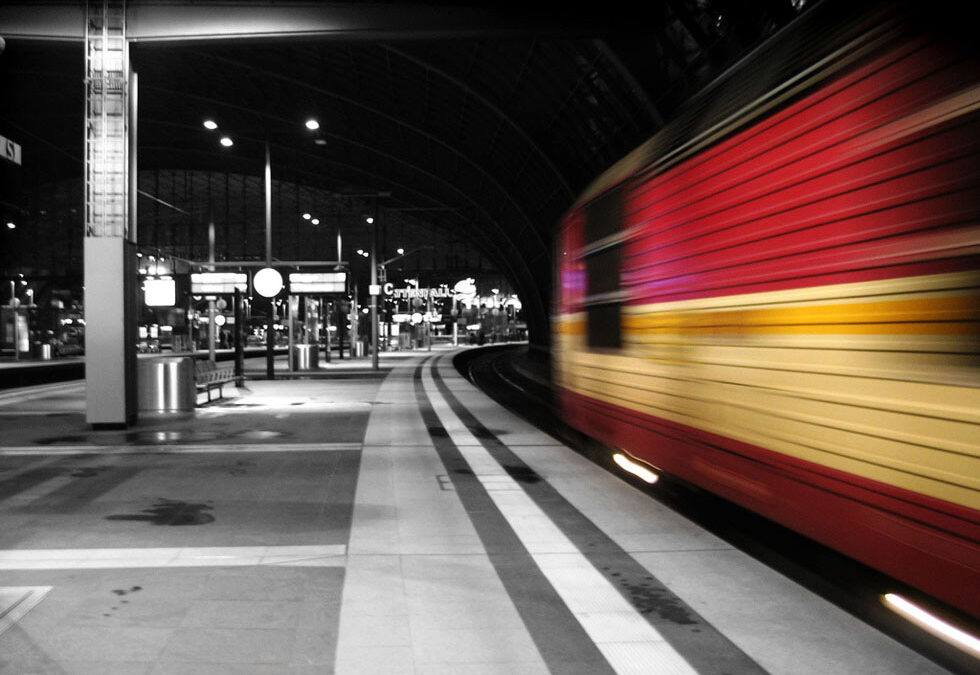
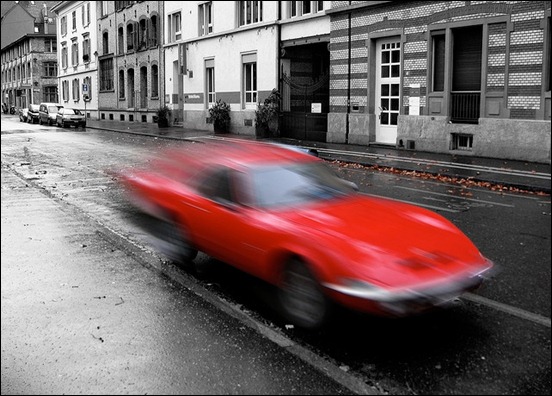
- Light Trails: Photograph cars at night to capture streaks of headlights and taillights.
- Flowing Water: Use long exposures to make rivers, waterfalls, or fountains appear silky and smooth.
- Street Photography: Blur passing people or cyclists to convey movement in busy urban scenes.
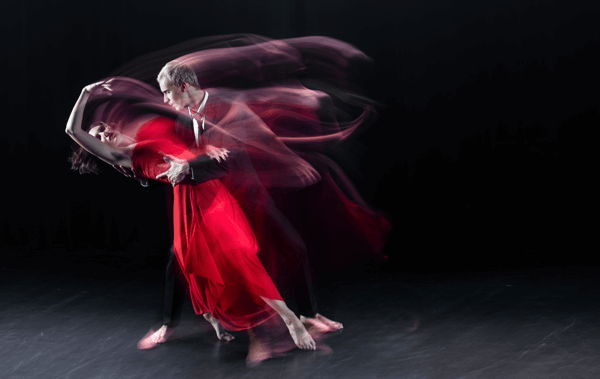
- Intentional Camera Movement: Move your phone during exposure for abstract effects.
Experimenting with different subjects and techniques can help you develop a unique style and better understand how motion blur affects your images.
Common Challenges and How to Solve Them
Achieving smooth, attractive blur with your iPhone can be tricky at first. Here are some common issues and solutions:
- Overexposed Images: Use an ND filter, lower ISO, or shoot at dusk/dawn to avoid blown-out highlights.
- Unwanted Camera Shake: Always use a tripod and, if possible, a remote shutter or timer.
- Subject Not Blurred Enough: Increase shutter speed or choose faster-moving subjects.
- Too Much Blur: Shorten exposure time or stabilize the camera further.
For more on the science and visual impact of motion blur, see this in-depth article: what motion blur is and how it affects visuals.
Tips for Better Motion Blur Photos on iPhone
- Plan Your Shot: Anticipate where the action will happen and pre-focus if possible.
- Use Burst Mode: Some apps allow burst shooting with manual settings—helpful for capturing the perfect moment.
- Edit Carefully: Use apps like Snapseed or Lightroom to fine-tune contrast and sharpness after shooting.
- Practice: The more you experiment, the better you’ll understand how different settings affect the final image.
FAQ
Can I create motion blur using only the default iPhone Camera app?
The default Camera app does not offer manual shutter speed control, making it difficult to achieve true motion blur. However, you can use Live Photos and the “Long Exposure” effect in the Photos app for some basic results, though third-party apps provide much more control and better quality.
What is the difference between motion blur and camera shake?
Motion blur is caused by the movement of the subject during a long exposure, while camera shake results from the camera itself moving during the shot. For a detailed explanation, refer to the motion blur vs camera shake article.
Do I need special equipment to capture motion blur on my iPhone?
While you don’t need expensive gear, a tripod or stable surface is highly recommended. An ND filter can also help in bright conditions, but most effects can be achieved with just your iPhone and a good camera app.
Which subjects work best for motion blur photography?
Moving vehicles, flowing water, crowds, and light sources at night are all excellent choices. The key is to have a subject that moves noticeably during the exposure time.
Conclusion
With the right apps, a steady hand (or tripod), and some experimentation, anyone can create compelling motion blur on iPhone camera shots. This technique adds drama and artistry to everyday scenes, making your mobile photography more dynamic and expressive. Start with the basics, try different subjects, and refine your approach as you go—soon, you’ll be capturing movement in ways that stand out from the crowd.