
Capturing motion blur with moving subject is a creative technique that can transform ordinary scenes into dynamic, visually compelling images. By intentionally allowing parts of your photo to blur, you can convey speed, direction, and the energy of movement. Whether you’re photographing cars racing down a street, dancers in mid-leap, or athletes in action, mastering this approach can add a new dimension to your photography.
This guide will break down the essential camera settings, practical tips, and creative ideas for achieving stunning results with moving subjects. If you’re interested in exploring related techniques, you might also find the motion blur car light trails tutorial helpful for understanding how light and movement interact in photography.
Understanding Motion Blur in Photography
Motion blur occurs when a moving object is captured with a slower shutter speed, causing the subject or background to appear streaked or smeared in the direction of movement. This effect can be used to emphasize action, create a sense of speed, or add artistic flair to your images. The key is to control the amount and direction of blur to suit your creative intent.
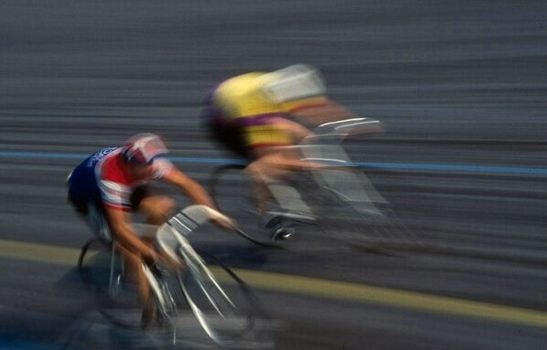
Photographers often use this technique to highlight the contrast between sharp, stationary elements and blurred, moving ones. For example, a cyclist in focus against a blurred background can make the viewer feel the rush of motion.
Essential Camera Settings for Blurring Moving Subjects
Achieving the right amount of motion blur with moving subject relies on a few critical camera settings. Here’s what you need to consider:
- Shutter Speed: The most important factor. Slower shutter speeds (such as 1/30s, 1/15s, or even slower) allow more movement to be recorded, resulting in more pronounced blur. The exact speed depends on how fast your subject is moving.
- Aperture: To compensate for the extra light entering during a long exposure, use a smaller aperture (higher f-number) to avoid overexposure.
- ISO: Keep ISO as low as possible to reduce noise, especially since longer exposures can introduce grain.
- Stabilization: Use a tripod or stable surface to keep the camera steady, unless you’re intentionally moving the camera for creative effect (like panning).
Creative Techniques for Dynamic Results
There are several ways to use motion blur with moving subject to enhance your photos. Here are some of the most effective methods:
Panning for Subject Sharpness
Panning involves moving your camera along with the subject’s motion during the exposure. This keeps the subject relatively sharp while the background blurs, emphasizing speed and direction. To master panning:
- Use a shutter speed between 1/30s and 1/125s, depending on subject speed.
- Follow the subject smoothly and steadily as you press the shutter.
- Practice timing and movement to achieve the right balance of sharpness and blur.
Intentional Blur for Artistic Effect
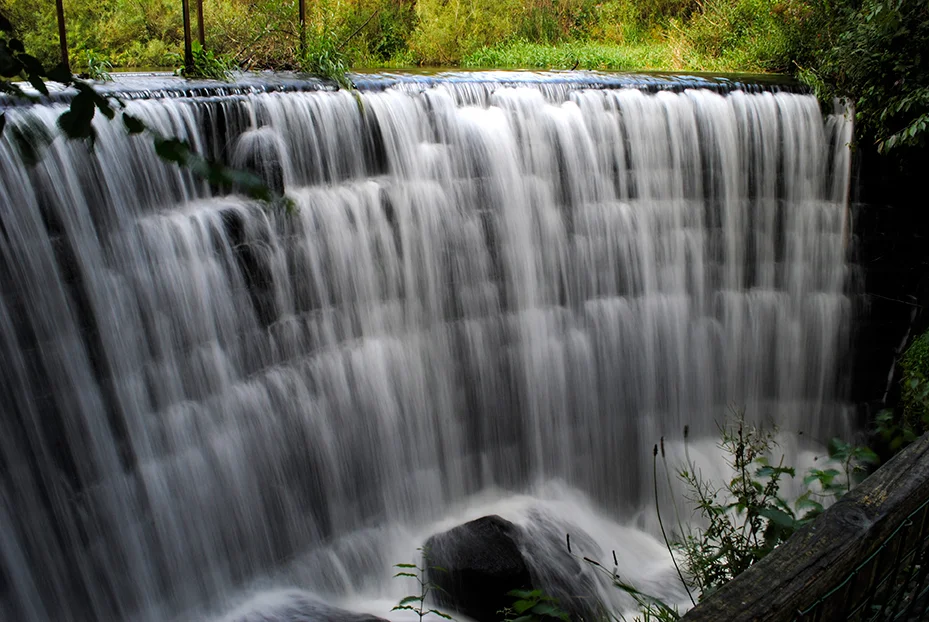
Sometimes, you may want the entire subject to blur, creating an abstract or ethereal look. This works well with dancers, crowds, or flowing water. Experiment with longer exposures and consider using neutral density filters in bright conditions to avoid overexposure.
Combining Stillness and Motion
Positioning a stationary object in the frame—like a bench, tree, or building—can provide a point of reference that makes the movement stand out even more. This contrast draws the viewer’s eye and adds depth to your composition.
Common Challenges and How to Overcome Them
Working with moving subjects and slow shutter speeds can be tricky. Here are some common issues and solutions:
- Unwanted Camera Shake: Use a tripod or image stabilization to keep the camera steady. If you’re panning, practice smooth movement.
- Overexposure: In bright light, use a smaller aperture, lower ISO, or add a neutral density filter to reduce incoming light.
- Missed Focus: Pre-focus on the area where you expect the subject to be, or use continuous autofocus to track movement.
- Too Much or Too Little Blur: Adjust your shutter speed incrementally and review your results to find the ideal setting for your scene.
Practical Tips for Better Motion Blur Photos
- Scout Your Location: Look for backgrounds that will enhance the sense of movement, such as city lights, trees, or crowds.
- Anticipate the Action: Observe your subject’s movement patterns so you can time your shots more effectively.
- Use Burst Mode: Shooting a rapid sequence increases your chances of capturing the perfect moment.
- Edit Carefully: Post-processing can help emphasize blur or recover detail, but avoid overdoing it to keep images natural.
For more in-depth advice and inspiration, check out this comprehensive guide to capturing motion blur in photography.
Exploring Related Concepts and Techniques
Understanding how our eyes perceive movement can also inform your creative choices. If you’re curious about the science behind this effect, the article on motion blur and human vision offers fascinating insights into why blurred images feel dynamic and natural.
Additionally, experimenting with motion blur settings in video games or exploring motion blur in 3D rendering can help you understand how this effect is simulated in digital environments, which may inspire new approaches in your photography.
Frequently Asked Questions
What shutter speed should I use to create motion blur with a moving subject?
The ideal shutter speed depends on how fast your subject is moving and the amount of blur you want. For moderate movement, try starting at 1/30s or 1/60s. For faster subjects, you may need to go even slower. Experiment and review your results to find the best setting for your scene.
How can I keep my subject sharp while blurring the background?
Use the panning technique: follow your subject’s motion with your camera during the exposure. This keeps the subject relatively sharp while the background blurs, emphasizing the sense of speed and direction.
Do I need special equipment to capture motion blur with moving subjects?
While a tripod or monopod can help stabilize your camera, you don’t need specialized gear. Most modern cameras and even smartphones allow you to adjust shutter speed. Neutral density filters are useful for controlling exposure in bright conditions, but they’re optional.