Creating visually compelling images often involves the use of motion blur to convey movement, energy, or atmosphere. While capturing this effect in-camera is ideal, many photographers and digital artists turn to post-processing to refine or add motion blur for greater control and creative flexibility. Understanding the best practices for enhancing or simulating this effect during editing can make a significant difference in the final result.
Whether you’re working with action shots, product photography, or creative composites, mastering motion blur post processing tips can help you achieve more dynamic and professional-looking images. Before diving into specific techniques, it’s important to distinguish between intentional blur and issues like camera shake, which can detract from image quality. For a deeper dive into this distinction, see the detailed guide on motion blur vs camera shake.
Understanding Motion Blur in Digital Editing
At its core, motion blur is the streaking or smearing of moving objects within a frame. In post-processing, this effect can be enhanced or introduced to emphasize speed, create a sense of depth, or add artistic flair. Unlike camera shake, which results from unintended camera movement, motion blur is usually a deliberate effect.
Digital editing tools offer a range of options for manipulating blur. These include linear, radial, and path-based blurs, each suited to different types of movement. The key is to use these tools subtly, ensuring the final image appears natural and consistent with the scene’s lighting and direction of motion.
Essential Tools for Effective Blur Enhancement
Most modern photo editors, such as Adobe Photoshop, GIMP, and Affinity Photo, provide robust features for adding or refining motion blur. The following are some of the most commonly used tools and filters:
- Motion Blur Filter: Simulates straight-line movement, ideal for vehicles or runners.
- Path Blur: Allows you to define custom movement paths, great for more complex or curved motion.
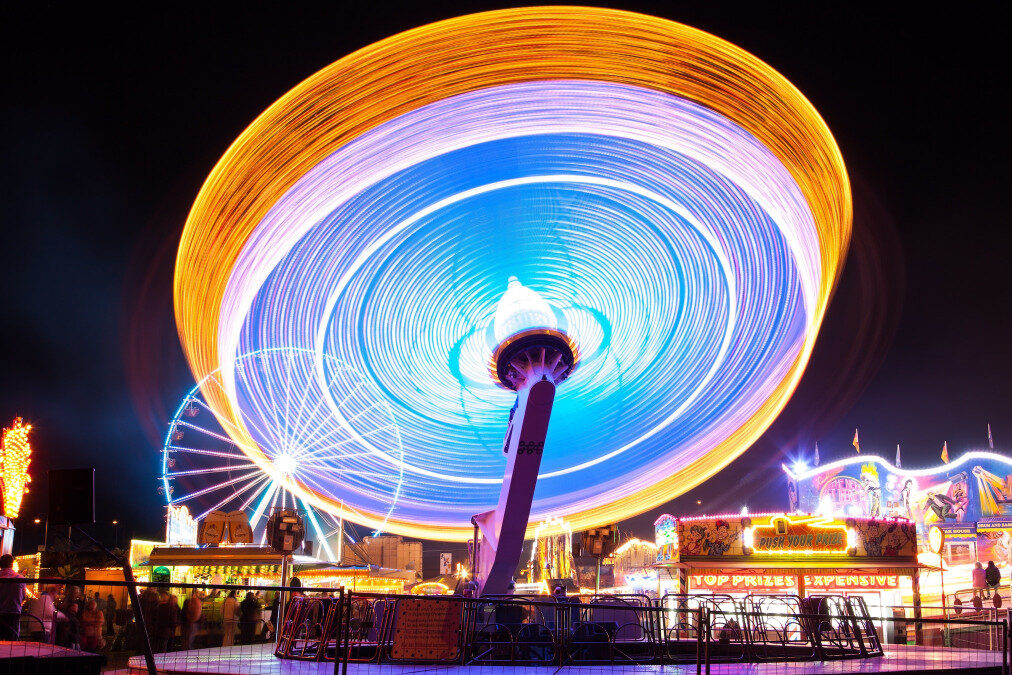
- Radial Blur: Useful for spinning effects, such as wheels or fans.
- Smart Objects: Enable non-destructive editing, letting you adjust or remove the blur effect later.
- Layer Masks: Provide precise control over where the blur is applied, helping to blend effects seamlessly.
Key Motion Blur Post Processing Tips for Realistic Results
To achieve convincing results, it’s important to follow a few fundamental guidelines. Here are several practical motion blur post processing tips that can elevate your workflow:
- Match the Direction of Movement: Always align the blur with the actual or intended direction of motion in the scene. Inconsistent blur direction can break the illusion and make the edit look artificial.
- Use Layer Masks for Precision: Apply blur selectively using layer masks. This technique allows you to keep key areas, such as faces or focal points, sharp while blurring only the moving elements.
- Adjust Opacity and Blending Modes: Fine-tune the intensity of the blur effect by lowering the layer’s opacity or experimenting with blending modes. This helps integrate the effect more naturally.
- Combine Multiple Blur Types: Sometimes, using a combination of linear and radial blurs can better replicate complex movements, such as a spinning cyclist moving forward.
- Pay Attention to Edges: Hard edges between blurred and sharp areas can look unnatural. Use soft brushes or feathered selections to blend transitions smoothly.
- Preserve Important Details: Avoid over-blurring areas that should remain crisp, such as eyes or product logos, to maintain clarity and focus.
Creative Applications and Advanced Techniques
Beyond basic enhancement, motion blur can be used creatively to transform ordinary images into dynamic compositions. Here are some advanced approaches:
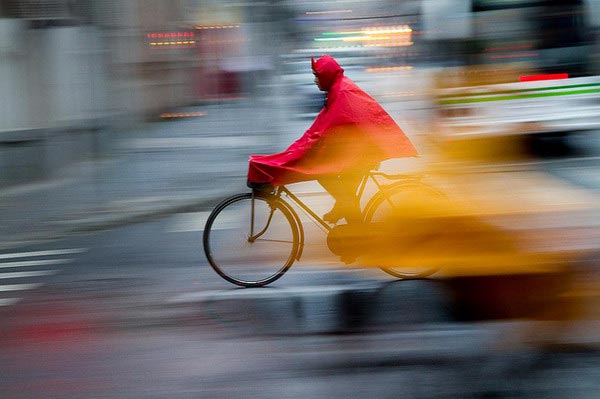
- Simulate Panning: By selectively blurring the background while keeping the subject sharp, you can mimic the effect of tracking a moving object with your camera.
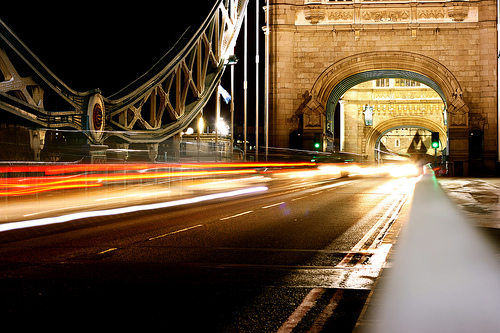
- Add Light Trails: Use path blur or custom brushes to create streaks of light, often seen in night photography of cars or cityscapes.
- Composite Multiple Exposures: Blend several images with varying degrees of blur to produce a layered, time-lapse effect.
- Emphasize Action in Sports Photography: Enhance the sense of speed and impact by applying directional blur to athletes or equipment in motion.
Common Mistakes to Avoid When Editing Motion Blur
Even experienced editors can fall into traps that undermine the realism of their work. Here are some pitfalls to watch out for:
- Overdoing the Effect: Excessive blur can obscure important details and make the image look unnatural.
- Ignoring Lighting and Shadows: The direction and intensity of blur should match the scene’s lighting to maintain believability.
- Uniform Blur Application: Applying the same amount of blur across the entire image can flatten the scene. Vary the intensity based on distance and speed.
- Forgetting Context: Consider the environment and subject matter. For example, a stationary object should not have motion blur unless it’s being affected by something else in the scene.
Resources for Further Learning
For those interested in deepening their understanding of motion blur post processing tips and related techniques, there are many resources available. A comprehensive overview can be found in this guide to mastering motion blur in studio photography, which covers both in-camera and post-production strategies.
Additionally, exploring topics like the importance of industrial vision inspection can provide context for how motion blur is managed in automated and industrial settings, especially where image clarity is critical for quality control.
Frequently Asked Questions
What is the difference between motion blur and camera shake?
Motion blur results from the movement of subjects within the frame during exposure, while camera shake is caused by unintended movement of the camera itself. The two effects can look similar but have different causes and solutions. For a detailed comparison, refer to the motion blur vs camera shake article.
How can I make motion blur look more natural in post-processing?
To achieve a realistic effect, always match the blur direction to the subject’s movement, use layer masks for selective application, and blend transitions with soft brushes. Adjusting opacity and using multiple blur types can also help integrate the effect seamlessly.
Are there any situations where motion blur should be avoided?
Yes, in scenarios where clarity and detail are critical—such as product photography, industrial inspection, or documentation—motion blur can be distracting or reduce the usefulness of the image. In these cases, it’s best to minimize or avoid adding blur during editing.