Motion blur before and after examples offer a compelling way to understand how movement can transform an ordinary photo into something dynamic and visually engaging. Whether you’re a beginner learning the basics or an experienced photographer looking to refine your technique, seeing side-by-side comparisons helps clarify the creative and technical impact of motion blur. This guide breaks down what motion blur is, how to achieve it, and what you can learn from real-world examples.
If you’re interested in using these techniques for social sharing, you might also find value in our motion blur instagram photography tips, which focus on optimizing your images for platforms like Instagram.
Understanding Motion Blur in Photography
Motion blur occurs when there is movement within the frame during the exposure. This can be intentional—used as a creative effect—or unintentional, resulting from camera shake or subject movement. In photography, it’s often used to convey speed, energy, or the passage of time. The amount of blur depends on factors like shutter speed, how fast the subject is moving, and whether the camera is stationary or panning.
By examining motion blur before and after examples, you can see how varying these factors changes the final image. For instance, a fast shutter speed might freeze a runner in mid-stride, while a slower shutter speed will create a streaking effect that suggests motion.
Key Techniques for Capturing Striking Motion Blur
To create effective motion blur, photographers typically use slower shutter speeds. Here are a few essential techniques:
- Slow Shutter Speed: Using a longer exposure allows moving subjects to blur across the frame.
- Panning: Moving the camera along with a moving subject keeps the subject sharp while blurring the background.
- Tripod Use: Stabilizing the camera ensures that only moving elements are blurred, not the entire scene.
- Neutral Density Filters: These filters reduce the amount of light entering the lens, making it possible to use slower shutter speeds even in bright conditions.
Mastering these techniques is crucial for anyone looking to produce professional-looking results. For more on the gear that can help, check out our motion blur camera gear recommendations.
Visual Comparison: Motion Blur Transformations
Let’s explore how motion blur changes the mood and focus of a photograph. The following images illustrate the dramatic difference between static and blurred scenes.
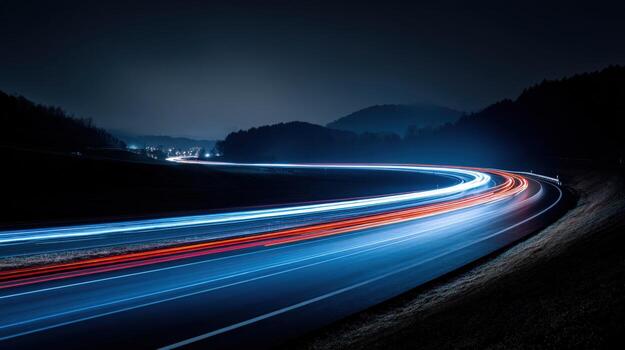
In this example, a long exposure captures the headlights and taillights of cars as continuous streaks. Without motion blur, the same scene would show static vehicles and a much less dynamic atmosphere.
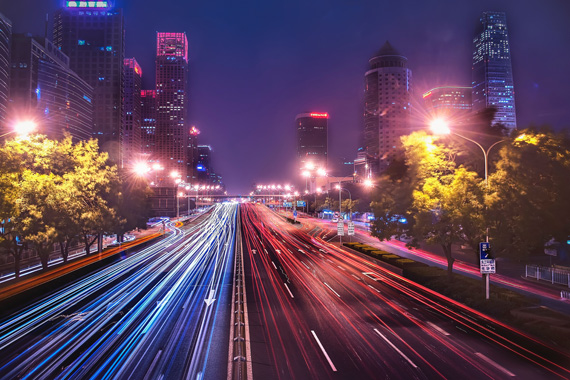
Here, the difference between a sharp and a blurred image is clear. The blurred version conveys a sense of bustling city life, while a sharp image would feel more static and less energetic.
Creative Uses of Motion Blur: Before and After Insights
Reviewing motion blur before and after examples can inspire new creative directions. Some common applications include:
- Sports Photography: Blurring athletes in motion emphasizes speed and intensity.
- Nature Scenes: Waterfalls and rivers appear silky and smooth when captured with long exposures.
- Street Photography: Pedestrians and vehicles become abstract shapes, adding energy to urban scenes.
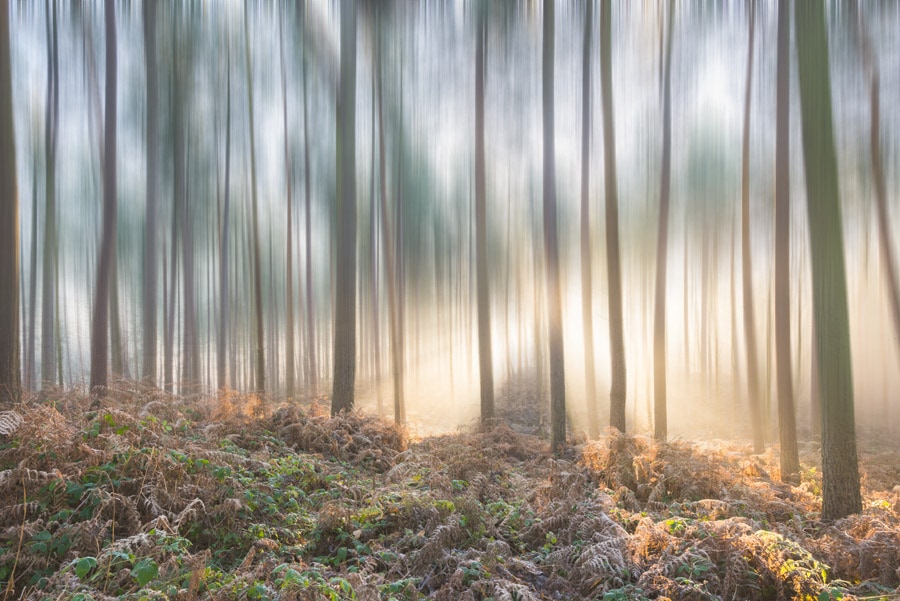
- Fine Art: Intentional camera movement can create painterly effects, transforming reality into abstraction.
For more inspiration, you can browse a curated collection of beautiful motion blur photos from around the world.
Common Mistakes and How to Avoid Them
While motion blur can be powerful, it’s easy to make mistakes. Here are some pitfalls to watch out for:
- Unintentional Camera Shake: If the camera isn’t stable, the whole image can become blurry. Use a tripod or image stabilization.
- Overexposure: Slow shutter speeds let in more light, which can wash out your photo. Adjust ISO and aperture or use ND filters.
- Subject Too Blurred: If the subject is unrecognizable, the effect may be distracting rather than artistic. Experiment with different shutter speeds to find the right balance.
Learning from motion blur before and after examples can help you spot these issues and refine your approach. For those interested in storytelling, our motion blur storytelling techniques article explores how to use blur to enhance narrative in your images.
Tips for Analyzing Before and After Motion Blur Photos
When reviewing side-by-side images, consider the following:
- Focus on the Subject: Does the blur highlight or distract from the main subject?
- Composition: Has the motion blur improved the visual flow or balance of the image?
- Emotion and Energy: Does the blurred version evoke a stronger feeling or sense of movement?
- Technical Quality: Is the blur smooth and intentional, or does it look accidental?
By asking these questions, you can better understand what works and why, helping you apply similar techniques to your own photography.
Expanding Your Skills with Motion Blur
Experimenting with different settings and reviewing your results is the best way to master motion blur. Try photographing moving subjects at various shutter speeds, and compare your own before and after shots to see what creates the most impact. For those shooting in urban environments, our urban photography guide offers additional tips tailored to city scenes.
Frequently Asked Questions
What camera settings are best for capturing motion blur?
The key setting is shutter speed. Slower shutter speeds (such as 1/30s, 1/10s, or even several seconds) allow moving subjects to blur. Use a tripod to keep the camera steady, and adjust ISO and aperture to maintain proper exposure.
How do I avoid unwanted blur in my photos?
To prevent accidental blur, use a faster shutter speed or stabilize your camera. If you want only part of the image blurred, try panning or using autofocus to keep the subject sharp while the background blurs.
Can motion blur be added in post-processing?
Yes, many photo editing programs offer tools to simulate motion blur. However, in-camera blur often looks more natural and authentic. Experiment with both methods to see which works best for your creative vision.