Capturing the energy and speed of athletes in action is one of the most exciting challenges in photography. Motion blur in sports photography is a creative technique that allows photographers to convey movement, intensity, and drama in a single frame. By intentionally allowing moving subjects to blur, you can create dynamic images that stand out from standard freeze-frame shots. Understanding how to use this effect effectively can elevate your sports images and help you tell a more compelling story.
Whether you’re shooting fast-paced games, track events, or even animal movement, mastering this approach requires a blend of technical knowledge and artistic vision. In this article, you’ll learn how to control blur, choose the right settings, and apply practical tips for more impactful sports images. For those seeking inspiration, you might also enjoy these motion blur composition examples that showcase creative ways to use this technique.
Understanding Motion Blur in Action Photography
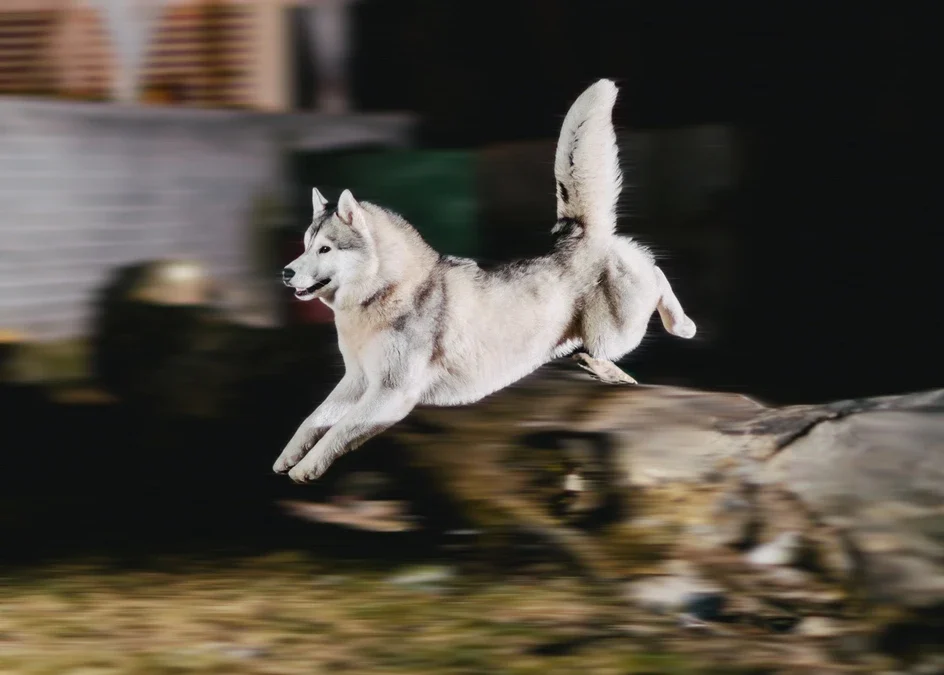
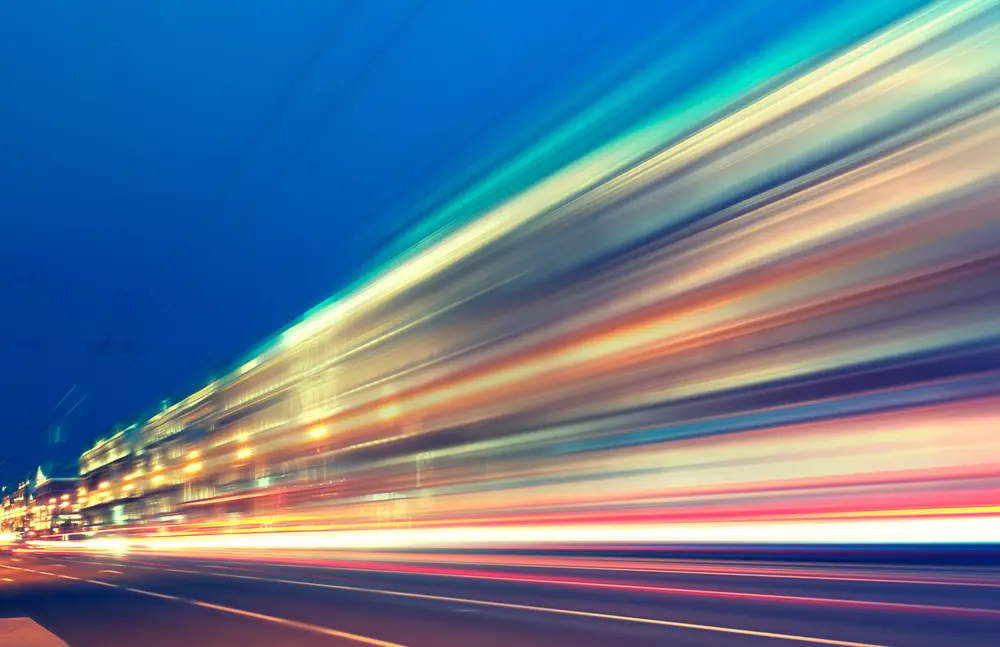
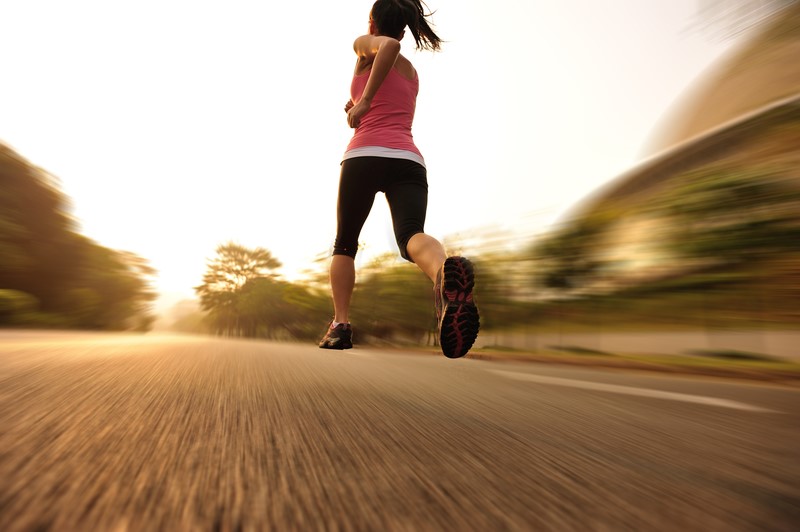
At its core, motion blur in sports photography refers to the streaking or smearing effect that occurs when a moving subject is captured with a slower shutter speed. Instead of freezing the moment, the camera records the path of movement, resulting in a sense of speed and direction. This effect can be used to highlight the intensity of a sprint, the arc of a swinging bat, or the rush of a cyclist.
The amount of blur you achieve depends on several factors:
- Shutter Speed: Slower speeds (such as 1/30s, 1/60s, or even slower) allow more movement to be recorded.
- Subject Speed: Faster-moving athletes or objects will create more pronounced blur at the same shutter speed.
- Camera Movement: Intentional panning (moving the camera with the subject) can keep the subject sharp while blurring the background.
- Lighting Conditions: Low light often requires slower shutter speeds, which can help or hinder your creative intent.
Essential Camera Settings for Capturing Movement
Getting the right settings is crucial for achieving the desired effect. Here are some practical tips:
- Shutter Priority Mode (Tv or S): This mode lets you select the shutter speed, while the camera adjusts aperture for correct exposure. Start with 1/60s and experiment based on the speed of your subject.
- Manual Mode: For full control, use manual settings. Adjust ISO and aperture to maintain proper exposure as you slow down the shutter.
- Continuous Autofocus (AI Servo/AF-C): This helps keep moving subjects sharp, especially when panning.
- Use a Tripod or Monopod: Stabilizing your camera reduces unwanted shake, especially when using slow shutter speeds.
For beginners, it’s helpful to review a motion blur settings for beginners guide to get comfortable with these adjustments.
Creative Techniques for Dynamic Sports Images
There are several ways to use motion blur to enhance your sports photos:
- Panning: Move your camera in sync with the moving subject. This keeps the athlete relatively sharp while blurring the background, emphasizing speed.
- Partial Blur: Combine a slightly faster shutter speed with rapid movement to keep part of the subject sharp (like a runner’s face) while other parts (like arms or legs) blur.
- Zoom Blur: Twist the zoom ring during exposure for a radial blur effect, which can add drama to certain action shots.
- Layered Motion: Capture multiple moving subjects at different speeds for a complex, storytelling composition.
Common Challenges and How to Overcome Them
While motion blur in sports photography can produce stunning results, it also comes with challenges:
- Unwanted Camera Shake: Use image stabilization, a tripod, or a monopod to minimize blur from your own movement.
- Overexposure: Slower shutter speeds let in more light. Compensate by lowering ISO, narrowing the aperture, or using neutral density (ND) filters.
- Missed Focus: Continuous autofocus and pre-focusing on a spot where the action will occur can help keep your subject sharp.
- Inconsistent Results: Practice and experimentation are key. Review your images and adjust settings as needed.
If you want to see how different settings affect your results, check out these motion blur before and after examples for a visual comparison.
Post-Processing Tips for Enhancing Motion Blur
Editing can help refine your images and emphasize the sense of movement. Here are some tips:
- Adjust Contrast and Clarity: Boosting contrast can make blurred areas pop, while clarity adjustments can help define the subject.
- Selective Sharpening: Use local adjustments to sharpen key parts of the image, drawing attention to faces or focal points.
- Crop for Impact: Tight cropping can enhance the sense of speed and focus the viewer’s attention on the action.
- Add or Enhance Blur: Some editing tools allow you to add radial or directional blur for creative effect, but use this sparingly to maintain authenticity.
For more creative approaches, explore this motion blur cinematic photography guide for advanced techniques.
Inspiration and Further Learning
Looking at the work of other photographers can spark new ideas. Browse through curated motion blur composition examples to see how different sports, settings, and creative choices can influence your results.
If you’re interested in sharing your work on social platforms, these motion blur Instagram photography tips can help you present your images for maximum impact.
For a deeper dive into the science and artistry behind this technique, you may find this comprehensive guide to motion blur photography especially useful.
Frequently Asked Questions
What shutter speed should I use to create motion blur in sports images?
The ideal shutter speed depends on the speed of your subject and the amount of blur you want. For most sports, starting around 1/60s to 1/125s can produce noticeable blur, but you may need to go slower for very fast action or experiment to achieve your desired effect.
How do I keep my subject sharp while blurring the background?
Use the panning technique: follow your subject with the camera as they move, using a slower shutter speed. This keeps the athlete relatively sharp while the background blurs, emphasizing motion.
Can I add motion blur in post-processing if I didn’t capture it in-camera?
Yes, many editing programs offer tools to simulate motion blur. However, in-camera blur often looks more natural and authentic. Use post-processing effects sparingly to enhance, rather than replace, the real movement captured during shooting.