Capturing sharp, crisp images is a goal for many photographers, but unwanted motion blur can often get in the way. Whether you’re shooting fast-moving subjects or working in low light, understanding how to reduce motion blur can make a significant difference in your photography. This guide explores practical techniques, camera settings, and helpful tips to help you minimize blur and achieve clearer results.
If you’re interested in creative uses of blur, you might also enjoy exploring motion blur composition examples for inspiration and artistic ideas.
Understanding the Causes of Motion Blur
Before tackling solutions, it’s important to know what causes blur in photographs. Motion blur typically occurs when the camera or subject moves during the exposure. This can happen for several reasons:
- Slow shutter speed
- Camera shake
- Subject movement
- Low light conditions
By identifying the source, you can choose the most effective technique to minimize unwanted blur in your images.
Camera Settings That Help Prevent Blurry Images
Adjusting your camera’s settings is one of the most direct ways to address motion blur. Here are some key settings to consider:
Increase Shutter Speed
The most effective way to reduce blur is to use a faster shutter speed. A quick exposure time means there’s less chance for movement to affect the shot. As a general rule, use a shutter speed at least as fast as the reciprocal of your lens’ focal length (for example, 1/100s for a 100mm lens). For fast-moving subjects, you may need to go even higher.
Adjust ISO and Aperture
If increasing shutter speed results in underexposed photos, compensate by raising the ISO or opening up the aperture (using a lower f-number). Higher ISO values make the sensor more sensitive to light, while a wider aperture lets in more light, both allowing for faster shutter speeds.
Use Image Stabilization
Many modern cameras and lenses feature built-in stabilization. This technology helps counteract small hand movements, allowing you to shoot at slower shutter speeds without introducing blur. Activate this feature when shooting handheld, but remember to turn it off when using a tripod for best results.
Practical Techniques for Sharper Photos
Beyond camera settings, there are several hands-on techniques that can help you achieve clearer, sharper images by minimizing motion blur.
Stabilize Your Camera
Using a tripod or resting your camera on a stable surface is one of the most reliable ways to prevent camera shake. If a tripod isn’t available, brace your arms against your body or a solid object to steady your shot.
Use a Remote Shutter or Timer
Pressing the shutter button can introduce slight movement. To avoid this, use a remote shutter release or set your camera’s timer. This is especially helpful for long exposures or macro photography.
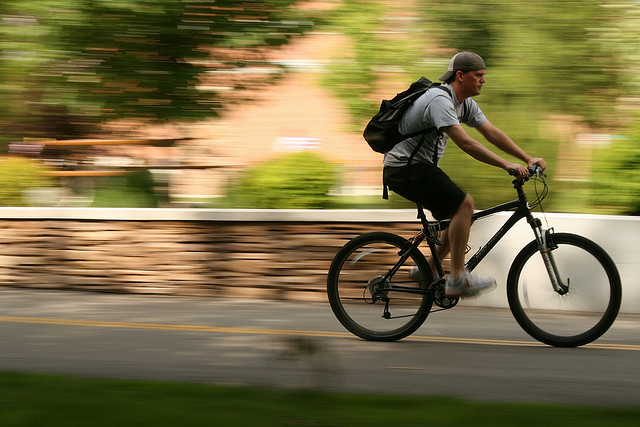
Track Moving Subjects
When photographing moving subjects, try panning your camera to follow the action. This technique can keep your subject sharp while blurring the background for a dynamic effect. Practice is key to mastering panning, as timing and smooth movement are essential.
Lighting and Environmental Factors
Good lighting is crucial for sharp images. Shooting in brighter conditions allows you to use faster shutter speeds without compromising exposure. If natural light is limited, consider using a flash or adding artificial lighting to your setup.
Environmental factors such as wind or unstable ground can also contribute to camera movement. Be mindful of your surroundings and adjust your shooting technique accordingly.
Editing and Post-Processing Solutions
Sometimes, even with careful technique, a bit of blur sneaks into your photos. While it’s best to get things right in-camera, certain editing tools can help salvage slightly blurry images:
- Sharpening filters in software like Adobe Lightroom or Photoshop can enhance edge detail.
- De-blur tools use advanced algorithms to reduce the appearance of motion blur.
- Selective sharpening allows you to target specific areas without affecting the whole image.
Remember, post-processing can only do so much. Severe blur is difficult to correct, so focusing on prevention during shooting is always the best approach.
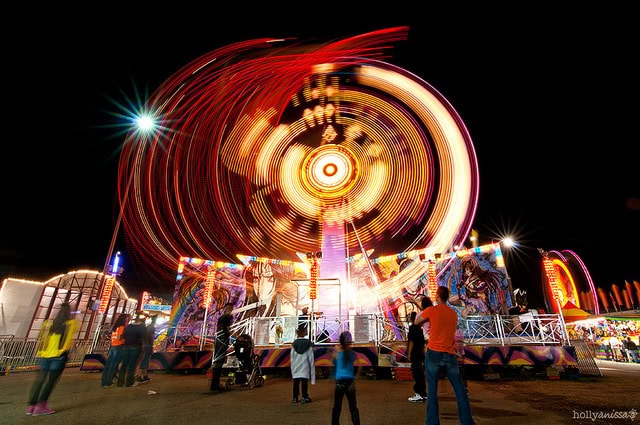
Creative Uses of Motion Blur
While this article focuses on minimizing unwanted blur, intentional use of motion can add energy and artistry to your photos. For more on this topic, check out our motion blur cinematic photography guide for creative inspiration and advanced techniques.
You can also explore a collection of beautiful motion blur photos to see how photographers use this effect artistically.
Frequently Asked Questions
What is the best shutter speed to avoid motion blur?
The ideal shutter speed depends on your subject and focal length. As a rule of thumb, use a speed equal to or faster than the reciprocal of your lens’ focal length (e.g., 1/50s for a 50mm lens). For fast-moving subjects, much faster speeds (1/500s or higher) may be necessary.
Can motion blur be fixed in post-processing?
Minor blur can sometimes be improved using sharpening or de-blur tools in editing software. However, heavily blurred images are difficult to fully correct, so prevention during shooting is more effective.
Does image stabilization help with moving subjects?
Image stabilization is most effective for reducing camera shake, not subject movement. For moving subjects, a faster shutter speed is usually required to freeze the action.
Are there recommended settings for beginners?
Yes, if you’re just starting out, our motion blur settings for beginners guide covers easy-to-follow tips and recommended camera settings.