Portrait photography is often associated with sharpness and clarity, but introducing motion blur for creative portraits can transform ordinary images into dynamic, expressive works of art. By intentionally allowing movement to be captured in your photos, you can evoke emotion, energy, and a sense of story that static images sometimes lack. This guide explores how to use motion blur techniques to elevate your portrait work, covering camera settings, creative approaches, and practical tips for both beginners and experienced photographers.
For those interested in exploring more examples and inspiration, consider browsing motion blur composition examples to see how different artists use movement in their portraits.
Understanding Motion Blur in Portrait Photography
Motion blur occurs when moving subjects or camera movement are captured during a longer exposure time, resulting in streaks or softness in the image. While often considered a technical flaw, motion blur for creative portraits is a deliberate technique that can add a sense of movement, mood, and artistry. The key is to control the blur so it enhances rather than detracts from your subject.
There are two main types of motion blur in portraiture:
- Subject movement: The person in the portrait moves during the exposure, creating a blurred effect that suggests action or emotion.
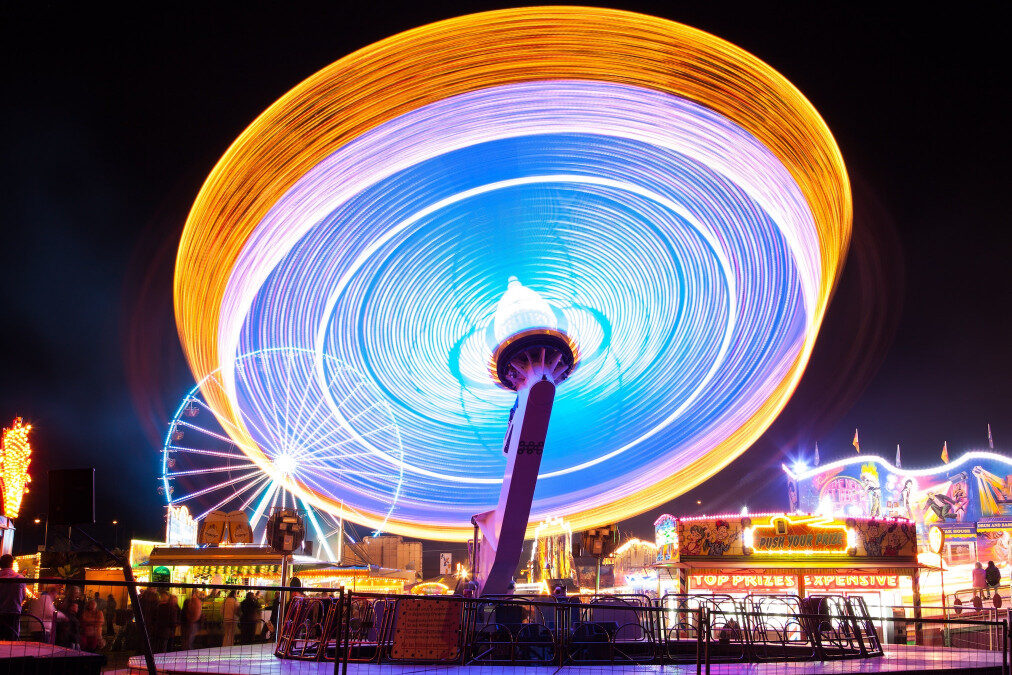
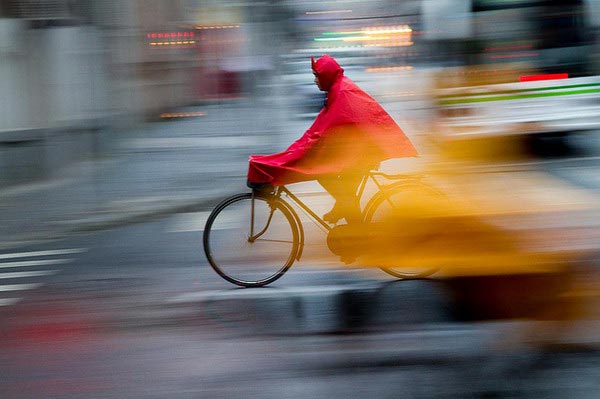
- Camera movement: The camera itself is moved (panned, tilted, or shaken) while the shutter is open, producing creative streaks or abstract backgrounds.
Essential Camera Settings for Motion Blur Effects
Achieving the right amount of blur requires understanding your camera’s exposure settings. Here are the main factors to consider:
- Shutter speed: The most critical setting. Slower shutter speeds (typically between 1/10 and 1 second) allow more movement to be captured. The exact speed depends on how fast your subject is moving and the desired effect.
- Aperture: A smaller aperture (higher f-number) lets in less light, which can help balance exposure when using slow shutter speeds in bright conditions. However, a wider aperture (lower f-number) can help isolate your subject with shallow depth of field.
- ISO: Lower ISO settings reduce noise, which is important for longer exposures. Increase ISO only if you need more sensitivity in low light.
For those just starting out, the motion blur settings for beginners guide provides a step-by-step breakdown of how to dial in your camera for these effects.

Creative Techniques for Expressive Portraits
There are many ways to incorporate motion blur for creative portraits into your workflow. Here are some popular techniques:
1. Intentional Subject Movement
Ask your subject to move naturally—turn their head, toss their hair, or walk through the frame. The resulting blur can suggest emotion, energy, or narrative. Experiment with different movements and shutter speeds to find the right balance between sharpness and blur.
2. Camera Panning
Follow your subject with the camera as they move. This keeps the subject relatively sharp while blurring the background, creating a sense of speed and focus. Panning works well with dancers, athletes, or anyone in motion.
3. Double Exposure and Layering
Some cameras allow you to combine multiple exposures in a single frame. Overlaying a sharp portrait with a blurred version can create a ghostly, surreal effect. Alternatively, blend images in post-processing for more control.
4. Using Props and Environment
Incorporate scarves, fabric, or other props that can move during the exposure. Wind, fans, or even passing vehicles can add dynamic elements to the scene. The environment can play a big role in shaping the final image.
Lighting Considerations for Motion Blur Portraits
Lighting is crucial when working with longer exposures. Here are some tips to manage light and achieve the desired effect:
- Natural light: Overcast days or shaded areas provide soft, even lighting ideal for motion blur. Bright sunlight can cause overexposure with slow shutter speeds, so use neutral density (ND) filters if needed.
- Artificial light: Continuous lights or LED panels allow you to control intensity and direction. Flash can be used creatively—try rear curtain sync to freeze the subject at the end of the exposure, combining sharpness with blur.
- Low light: Shooting at dusk, indoors, or in dim environments naturally allows for longer exposures without overexposing the image. Use a tripod to prevent unwanted camera shake.
Post-Processing Tips for Enhanced Motion Blur
Editing software can help refine your images and emphasize the artistic qualities of motion blur. Consider these adjustments:
- Contrast and clarity: Boost contrast to make blurred areas stand out against sharper elements.
- Selective sharpening: Apply sharpening only to the subject’s face or eyes to draw attention.
- Color grading: Use color to set the mood—cool tones for calm, warm tones for energy.
- Layer masking: Blend sharp and blurred layers for a balanced, surreal look.
For more advanced techniques, the motion blur cinematic photography guide dives deeper into editing workflows and creative effects.
Common Challenges and How to Overcome Them
Working with motion blur for creative portraits presents unique challenges. Here’s how to address some of the most common issues:
- Unwanted camera shake: Use a tripod or stable surface for long exposures, unless intentional camera movement is part of your creative vision.
- Overexposure: Lower your ISO, use a smaller aperture, or add ND filters to control light during slow shutter speeds.
- Subject cooperation: Communicate your vision clearly with your model. Show examples and experiment together to achieve the right look.
- Focus issues: Pre-focus on the spot where you expect the subject to be sharpest, or use manual focus for consistency.
Inspiration and Further Learning
Looking for more ideas? Explore motion blur creative inspiration to see how artists push the boundaries of portraiture. You can also study motion blur before and after examples to understand how subtle changes in movement and settings affect the final image.
For a deep dive into advanced studio techniques, check out this comprehensive guide to mastering motion blur in studio photography for professional insights and tips.
FAQ: Creative Motion Blur in Portraits
What shutter speed should I use for motion blur in portraits?
The ideal shutter speed depends on the effect you want and how fast your subject is moving. For subtle blur, try 1/30 to 1/10 second. For more dramatic effects, experiment with 1/4 second or longer. Always test and adjust based on your lighting and movement.
Can I create motion blur without a tripod?
Yes, but using a tripod helps prevent unwanted camera shake, especially at slower shutter speeds. If you want intentional camera movement, handholding can be part of your creative process. Otherwise, stabilize your camera for best results.
How do I keep my subject’s face sharp while adding blur?
Use techniques like panning, where you move the camera with your subject, or combine flash with a slow shutter (rear curtain sync) to freeze the face at the end of the exposure. You can also blend sharp and blurred images in post-processing for more control.