Motion blur in Final Cut Pro is a powerful visual effect that helps editors create a sense of speed, movement, and realism in their video projects. Whether you’re working on action sequences, cinematic transitions, or stylized music videos, understanding how to control and refine motion blur can elevate the quality of your edits. This guide covers the fundamentals of motion blur, practical steps for applying it in Final Cut Pro, and tips for achieving professional-looking results.
For those looking to expand their creative toolkit, exploring motion blur composition examples can provide valuable inspiration and practical insights on how to use this effect effectively in various editing scenarios.

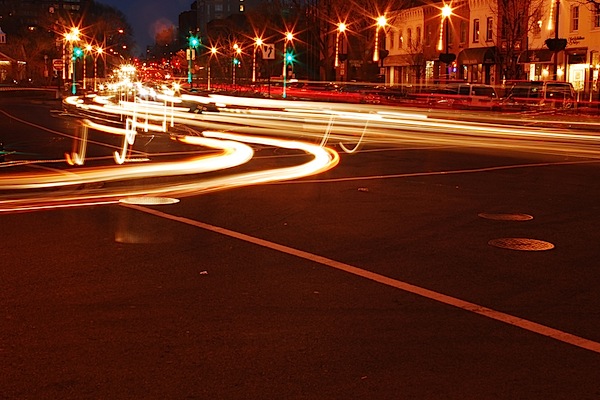
Understanding Motion Blur and Its Role in Video Editing
Motion blur is the streaking or smearing of moving objects in a frame, caused by rapid movement and the camera’s exposure time. In video editing, it’s used to mimic the natural blur that occurs in real-world footage, making digital effects and transitions appear smoother and more realistic. When applied thoughtfully, it can enhance the sense of motion and energy in a scene, drawing viewers into the action.
In Final Cut Pro, motion blur can be introduced in several ways, including through built-in tools, third-party plugins, and manual compositing techniques. Each approach offers different levels of control and flexibility, depending on the needs of your project.

How to Apply Motion Blur Effects in Final Cut Pro
There are several practical methods for adding motion blur to your video clips in Final Cut Pro. Here’s a step-by-step overview of the most common techniques:
1. Using Built-In Effects and Transitions
While Final Cut Pro does not include a dedicated motion blur filter by default, you can simulate the effect using built-in tools:
- Directional Blur: Apply the Directional Blur effect from the Effects Browser. Adjust the angle and blur amount to match the direction and speed of your subject’s movement.
- Gaussian Blur with Keyframes: Animate the blur amount using keyframes to create a custom blur that follows the movement of objects or transitions.
- Blend Modes: Duplicate your video layer, apply a blur effect to the duplicate, and set the blend mode to “Lighten” or “Screen” for a subtle, layered blur.
2. Leveraging Third-Party Plugins
For more advanced control, many editors turn to third-party plugins specifically designed for motion blur. Plugins like ReelSmart Motion Blur (RSMB) or MotionVFX’s mMotion Blur offer sophisticated algorithms that analyze motion vectors and apply realistic blur automatically. These tools often provide sliders for intensity, shutter angle, and quality, allowing you to fine-tune the effect for each shot.
3. Manual Compositing Techniques
If you want complete creative control, you can manually composite motion blur by duplicating layers, offsetting frames, and blending them together. This approach is more time-consuming but can yield unique results, especially for stylized projects or experimental edits.
Best Practices for Realistic Results
Achieving convincing motion blur in your edits requires attention to detail and an understanding of how movement interacts with the camera. Here are some best practices to keep in mind:
- Match Blur to Motion: The direction and intensity of the blur should correspond to the speed and path of the moving object. Overdoing the effect can make footage look unnatural.
- Use Reference Footage: Study real-world examples or reference material to understand how motion blur appears in different scenarios. This can help you replicate authentic looks in your edits.
- Preview and Adjust: Always preview your edits at full resolution and frame rate. Make incremental adjustments to blur settings to avoid introducing unwanted artifacts or ghosting.
- Combine with Other Effects: Motion blur often works best when combined with other effects like color grading, speed ramping, or camera shake to create a cohesive, cinematic feel.
For those just starting out, the motion blur settings for beginners guide offers step-by-step instructions and tips tailored to new editors.
Creative Uses and Inspiration
Beyond technical accuracy, motion blur is a creative tool that can be used to evoke emotion, emphasize movement, or add artistic flair to your projects. Some popular applications include:
- Action Sequences: Enhance the speed and impact of fast-moving subjects, such as vehicles, athletes, or dancers.
- Transitions: Smooth out cuts and create seamless transitions between scenes by blurring the outgoing and incoming shots.
- Stylized Effects: Use exaggerated blur for dream sequences, flashbacks, or music videos to create a distinctive visual style.
For more creative ideas, check out the motion blur creative inspiration resource, which showcases innovative uses of this effect across different genres.
Common Challenges and Troubleshooting Tips
While adding motion blur can greatly enhance your videos, it’s not without its challenges. Here are some common issues editors face and how to address them:
- Unwanted Artifacts: Excessive blur or incorrect settings can introduce ghosting, halos, or double images. Reduce the blur amount or adjust the direction to minimize these effects.
- Performance Slowdowns: High-quality motion blur effects, especially from third-party plugins, can be resource-intensive. Consider rendering previews or using proxy media for smoother playback.
- Inconsistent Results: Applying the same blur settings to every clip may not work, especially if the speed or direction of movement varies. Customize settings for each shot to maintain consistency.
If you’d like to see real-world transformations, the motion blur before and after examples guide provides side-by-side comparisons that illustrate the impact of this effect.
Further Learning and Resources
To deepen your understanding of motion blur and its applications in both video and photography, consider exploring additional resources. For example, this comprehensive guide on capturing motion blur in photography offers valuable insights that can be translated into video editing workflows.
For those interested in cinematic approaches, the motion blur cinematic photography guide dives into advanced techniques and creative strategies for achieving film-like results.
Frequently Asked Questions
What is the main purpose of motion blur in video editing?
The primary purpose is to simulate the natural blur that occurs when objects move quickly in front of a camera. This effect helps make digital edits appear more realistic and visually engaging, especially in fast-paced scenes.
Can I add motion blur to specific parts of a clip in Final Cut Pro?
Yes, you can target specific areas by masking or applying the effect only to certain layers. Using keyframes and masks allows you to control where and when the blur appears, giving you precise creative control.
Are third-party plugins necessary for professional results?
While you can achieve basic blur effects with built-in tools, third-party plugins offer more advanced features, better automation, and higher quality results. They are especially useful for complex projects or when you need to match industry standards.
Does motion blur affect export times or playback performance?
Yes, applying high-quality blur effects can increase render times and may slow down playback, especially on older hardware. Using proxy media and rendering previews can help maintain a smooth editing workflow.