Motion blur can transform ordinary YouTube videos into dynamic, visually engaging content that captures viewers’ attention. Whether you’re filming action scenes, vlogs, or cinematic sequences, understanding how to use motion blur effectively is essential for creators aiming to elevate their production quality. This guide covers practical strategies, camera settings, and editing techniques to help you master this visual effect and make your content stand out.
If you’re looking for creative inspiration or want to see how others have used this effect, check out these motion blur composition examples for ideas and reference points.
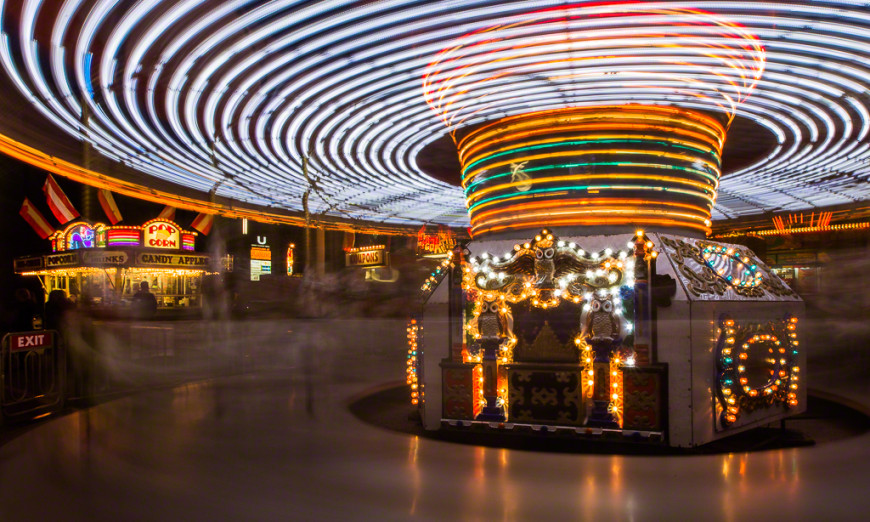
Understanding Motion Blur in Video Production
Motion blur occurs when moving objects appear streaked or smeared in a video frame due to the relative motion between the camera and the subject during exposure. In filmmaking and YouTube content creation, this effect can add a sense of speed, energy, or realism to your footage. However, using it incorrectly can result in distracting or unprofessional-looking videos.
The amount of blur is primarily controlled by your camera’s shutter speed. A slower shutter speed increases blur, while a faster one reduces it. For most video, the standard “cinematic” look is achieved using the 180-degree shutter rule, where the shutter speed is set to double the frame rate (for example, 1/50s for 25fps footage).
Essential Camera Settings for Capturing Motion Blur
To achieve the right amount of motion blur, you’ll need to adjust your camera settings thoughtfully. Here are the key factors:
- Shutter Speed: As mentioned, use the 180-degree shutter rule for natural-looking blur. For slow-motion or stylized effects, experiment with slower shutter speeds.
- Frame Rate: Higher frame rates (like 60fps or 120fps) require even faster shutter speeds, which can reduce blur. If you want more blur, stick to standard frame rates (24fps or 30fps).
- Lighting: Slower shutter speeds let in more light, so you may need to use ND filters or adjust your aperture and ISO to avoid overexposure.
- Stabilization: Handheld shots with motion blur can look chaotic. Use a tripod or gimbal for smoother results.

Creative Ways to Use Motion Blur in YouTube Content
Incorporating blur into your YouTube videos can enhance storytelling and visual interest. Here are some creative applications:
- Action Sequences: Emphasize speed and excitement in sports, dance, or chase scenes by allowing some blur on fast-moving subjects.
- Transitions: Use intentional blur during camera pans or whip transitions to create smooth, energetic scene changes.
- Time-lapse and Hyperlapse: Slow shutter speeds in time-lapse sequences can create beautiful light trails or flowing crowds.
- Vlogs and Travel Videos: Add a sense of movement to walking or driving shots, making the viewer feel immersed in the journey.
For more ideas on how to use this effect artistically, explore the motion blur creative inspiration guide, which showcases unique approaches from various creators.
Editing Techniques for Enhancing Motion Blur in Post-Production
Sometimes, you may need to add or enhance blur during editing. Most popular video editors offer tools and plugins to help you achieve this effect:
- Directional Blur: Apply this effect to simulate movement in a specific direction, useful for transitions or emphasizing motion.
- Frame Blending: This technique blends multiple frames together, creating smoother blur for slow-motion or time-lapse footage.
- Motion Vector Plugins: Advanced plugins can analyze movement and generate realistic blur, even if it wasn’t captured in-camera.
When using these tools, moderation is key. Too much artificial blur can look unnatural. Always preview your edits on different screens to ensure the effect enhances rather than distracts from your story.

Common Mistakes to Avoid When Using Motion Blur
While adding blur can elevate your videos, there are pitfalls to watch for:
- Overusing the Effect: Excessive blur can make footage look messy or disorienting. Use it purposefully.
- Ignoring Lighting: Slower shutter speeds can lead to overexposed footage if lighting isn’t controlled.
- Unstable Shots: Shaky handheld footage with blur can be hard to watch. Use stabilization tools or equipment.
- Inconsistent Settings: Switching between different shutter speeds or frame rates within one video can break visual continuity.
If you’re new to these techniques, the motion blur settings for beginners guide offers step-by-step instructions tailored for those just starting out.
Comparing Before and After: The Impact of Motion Blur
Seeing the difference that blur makes can help you decide how much to use in your own projects. Before-and-after comparisons highlight how this effect can add drama, focus, or a sense of movement to otherwise static scenes.
For visual examples and deeper analysis, visit the motion blur before and after examples page to see side-by-side comparisons from real creators.
Further Learning and Resources
For those interested in the technical side or looking to expand their knowledge, this comprehensive guide to motion blur photography covers both still and moving images, offering tips that can be adapted for video work as well.
If you want to explore cinematic approaches, the motion blur cinematic photography guide delves into advanced techniques and creative workflows for achieving film-like results.
FAQ: Motion Blur for YouTube Creators
What is the ideal shutter speed for creating natural motion blur in YouTube videos?
The most widely used approach is the 180-degree shutter rule, where your shutter speed is set to double your frame rate (e.g., 1/50s for 25fps footage). This produces a natural-looking blur similar to what viewers expect from movies and high-quality online videos.
Can I add motion blur in post-production if I didn’t capture it in-camera?
Yes, most editing software offers blur effects and plugins that can simulate this effect. However, in-camera blur usually looks more organic. Use post-production tools to enhance or correct footage, but try to capture the effect during filming when possible.
How can I prevent unwanted blur in my YouTube videos?
To minimize blur, use a faster shutter speed, increase your frame rate, and ensure your camera is stable. Good lighting also helps, as it allows you to use faster settings without underexposing your footage.
Does motion blur affect video quality or viewer experience?
When used correctly, blur can enhance the viewing experience by adding realism and energy. However, excessive or poorly controlled blur can reduce clarity and make videos harder to watch. Always preview your edits and adjust settings to suit your content and audience.