The use of motion blur in 3d rendering is a crucial factor in achieving realistic animations and still images. By simulating the streaking of moving objects, artists and studios can add a sense of speed, depth, and authenticity to their digital scenes. Whether you are working on a cinematic sequence, a product visualization, or a game asset, understanding how to implement and control this effect is essential for producing professional-quality visuals.
This article explores the core principles behind motion blur, the main approaches used in 3D graphics software, and best practices for integrating this effect into your workflow. If you are interested in how motion blur is handled in other contexts, you might also find our guide on motion blur on android camera helpful for comparison.
Understanding Motion Blur in Digital Graphics
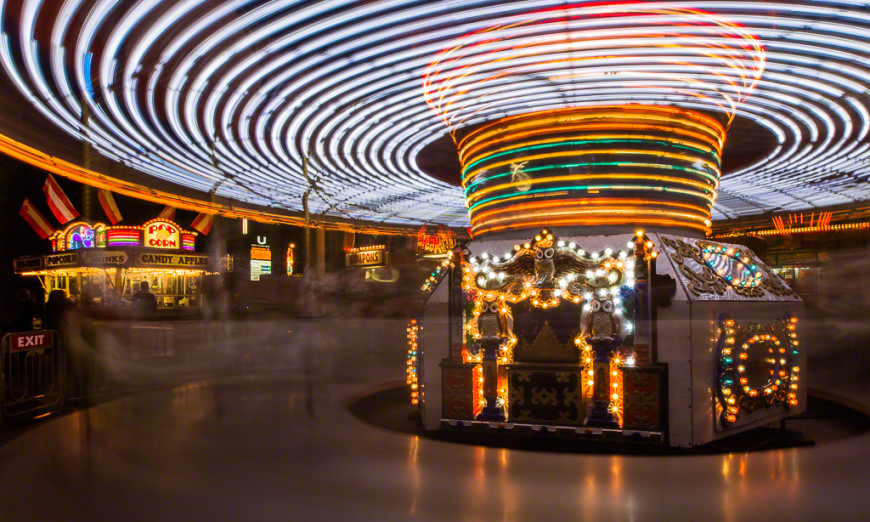
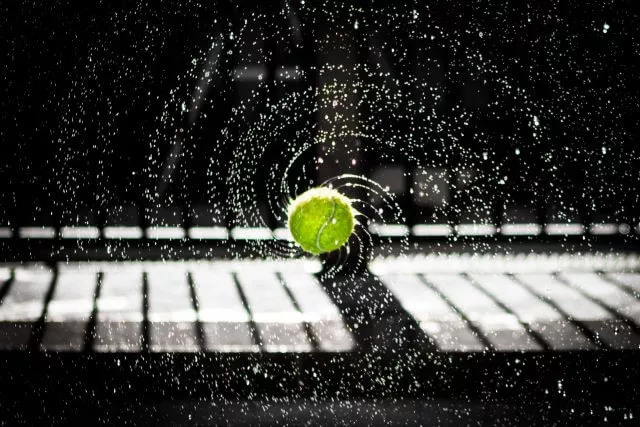
In photography and cinematography, motion blur occurs when a moving subject is captured over a period of time, causing it to appear streaked or smeared in the final image. In the digital world, replicating this effect in 3D rendering is not just about aesthetics—it also helps viewers interpret motion, speed, and direction, making scenes feel more natural and less artificial.
The challenge in computer graphics is that 3D renders are, by default, perfectly sharp unless additional effects are applied. This can result in images that look unnaturally static, especially when depicting fast-moving objects or camera pans. By introducing motion blur effects in 3D scenes, artists can bridge the gap between digital and real-world visuals.
Core Techniques for Simulating Motion Blur
There are several methods for achieving a convincing blur effect in 3D rendering. The choice of technique depends on the rendering engine, project requirements, and desired level of realism. Here are the most common approaches:
- Shutter-Based (True 3D) Motion Blur: This technique simulates the way a real camera shutter works. The renderer samples the position of objects and the camera over a specified time interval, blending multiple samples into a single frame. This produces highly accurate results but can be computationally intensive.
- Image-Based (Post-Process) Blur: Instead of simulating motion during rendering, this method applies blur as a post-processing effect. It uses velocity or motion vectors generated during rendering to smear pixels in the direction of movement. While faster, it may not handle complex interactions (like overlapping moving objects) as accurately.
- Manual or Artistic Blur: Sometimes, artists manually paint or composite blur effects in 2D editing software. This is less precise but can be useful for still images or where full 3D simulation is not practical.

Why Motion Blur Matters in 3D Animation
Adding motion blur in 3d rendering is not just a stylistic choice—it has practical implications for both realism and viewer comfort. Without it, fast movements can appear choppy or stroboscopic, especially at lower frame rates. This effect helps smooth out motion, making animations easier to follow and more visually appealing.
In visual effects and animation, the absence of blur can break the illusion of reality, drawing attention to the artificial nature of the scene. By carefully tuning the amount and quality of blur, artists can guide the viewer’s eye, emphasize action, and create a more immersive experience.
Implementing Motion Blur in Popular 3D Software
Most modern 3D applications and render engines offer built-in options for simulating blur from motion. Here’s how some of the leading tools handle this effect:
- Blender: Offers both shutter-based and vector pass post-processing blur. The Cycles and Eevee engines provide controls for shutter speed, sample count, and vector pass output.
- Autodesk Maya: Arnold and other renderers support true 3D blur with adjustable shutter settings. Maya also allows for velocity pass output for compositing.
- 3ds Max: V-Ray and Arnold both include advanced blur controls, letting users balance quality and render time.
- Cinema 4D: Physical and Redshift renderers offer robust blur simulation, with options for both in-render and post-process effects.
When implementing this effect, consider the impact on render times. True 3D blur can significantly increase computation, especially for scenes with many fast-moving elements. Post-process methods are faster but may require extra setup, such as rendering motion vector passes.
Best Practices for Realistic Blur Effects
Achieving a convincing blur effect in 3D rendering requires careful attention to detail. Here are some practical tips:
- Match Real-World Camera Settings: Use reference images or footage to determine appropriate shutter speeds and exposure times for your scene.
- Balance Quality and Speed: For animations, test different sample counts and vector pass settings to find the right compromise between realism and render time.
- Use Motion Vectors Wisely: When using post-process blur, ensure your renderer outputs accurate motion vectors. Check for artifacts, especially at object edges or where multiple objects overlap.
- Preview Early and Often: Render test frames or short sequences to evaluate the effect before committing to long renders.
- Integrate with Other Effects: Combine blur with depth of field, lens flares, and color grading for a cohesive final look.
For more on the creative use of blur in photography, you can explore this comprehensive guide to motion blur photography.
Common Challenges and Troubleshooting
While adding blur from motion can elevate your renders, it also introduces some challenges:
- Increased Render Times: True 3D blur requires more samples and longer render times. Consider using denoising tools or optimizing your scene for efficiency.
- Artifacts and Ghosting: Incorrect motion vector passes or overlapping objects can cause unwanted streaks or double images. Always check your passes and compositing workflow.
- Unnatural Results: Overdoing the effect can make scenes look smeared or confusing. Use real-world references to guide your settings.
If you’re interested in exploring related topics, our article on motion blur in videography offers a deeper dive into how these effects are used in moving images.
Related Techniques and Further Learning
Mastering motion blur in 3d rendering opens the door to a range of creative possibilities. For those looking to refine their skills further, consider learning about:
- Slow Motion Rendering: Combining blur with slow-motion effects can produce dramatic results. Our resource on motion blur in slow motion video explains how to achieve this.
- Post-Processing Tips: Fine-tune your renders with advanced compositing techniques. See our motion blur post processing tips for practical advice.
- Mobile and Device-Specific Effects: Learn how blur is handled on different platforms, such as our guide to motion blur on iPhone camera.
FAQ
What is the difference between 3D and 2D motion blur?
3D motion blur is calculated based on the actual movement of objects and cameras within a 3D scene, resulting in physically accurate streaks and smears. 2D motion blur, often applied in post-processing, uses image-based techniques to simulate the effect by blurring pixels in the direction of motion. While 2D methods are faster, they may not capture complex interactions as precisely as true 3D simulation.
How can I reduce render times when using motion blur?
To optimize render times, consider lowering the number of motion blur samples, using post-process blur where possible, and enabling denoising features in your render engine. Additionally, optimize your scene by reducing unnecessary geometry and textures, and use lower-resolution previews for test renders before committing to final output.
Why does my motion blur look unnatural or have artifacts?
Unnatural blur or artifacts can result from incorrect motion vector passes, overlapping objects, or excessive blur settings. Ensure your renderer is outputting accurate motion data, check for compositing errors, and compare your results to real-world references to fine-tune the effect. Adjusting shutter speed and sample count can also help achieve more natural results.