Capturing the dynamic energy of the night often means embracing motion blur in night photography. This creative technique transforms moving lights, vehicles, and even people into streaks and patterns, adding a sense of movement and atmosphere to your images. While it may seem challenging at first, mastering this approach opens up a world of expressive possibilities for photographers who want to go beyond static night scenes.
In this article, you’ll discover professional strategies for achieving striking motion effects after dark. We’ll cover essential camera settings, gear recommendations, and composition tips to help you create images that stand out. For those seeking more inspiration, you can also explore motion blur composition examples to see how other photographers approach this technique.
Understanding Motion Blur for Night Shoots
At its core, motion blur is the visible streaking or smearing of moving subjects caused by a slow shutter speed. In low-light conditions, longer exposures are often necessary, which naturally lends itself to this effect. Rather than fighting it, many photographers use motion blur to create drama, emphasize movement, or convey the passage of time.
The key is learning how to control the amount and direction of blur. By adjusting your camera’s settings and carefully planning your shot, you can decide whether to freeze action, allow partial blur, or fully embrace the abstract qualities of moving lights and subjects.
Essential Camera Settings for Capturing Movement
To achieve compelling motion blur in night photography, start by switching your camera to manual or shutter priority mode. This gives you full control over exposure time, which is the most critical factor for this technique.
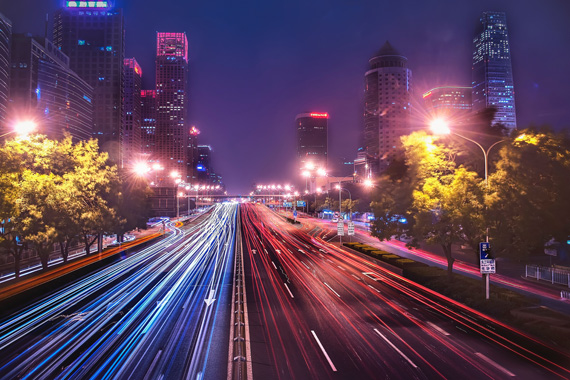
- Shutter Speed: For pronounced blur, use exposures between 1/10 second and several seconds. Light trails from cars, for example, often require 5–30 seconds depending on traffic and ambient light.
- Aperture: Adjust your f-stop to balance exposure. Wider apertures (lower f-numbers) let in more light but reduce depth of field, while narrower apertures (higher f-numbers) can help keep more of the scene in focus.
- ISO: Keep ISO as low as possible (e.g., ISO 100–400) to minimize noise, which can be especially noticeable in night scenes.
- Stabilization: Use a tripod to prevent unwanted camera shake. Even slight movement during a long exposure can ruin sharp elements in your composition.

For those new to these settings, the motion blur settings for beginners guide offers a step-by-step breakdown of how to get started.
Creative Approaches to Nighttime Motion Effects
There are several ways to incorporate motion blur into your night images. Some photographers prefer to keep the camera completely still, letting only moving subjects blur. Others experiment with intentional camera movement (ICM) to create painterly effects. Here are a few popular techniques:
- Light Trails: Position yourself near a busy road or intersection. Use a long exposure to capture the headlights and taillights of passing vehicles as colorful streaks.
- People in Motion: In urban environments, try photographing crowds or individuals walking through a scene. Stationary elements remain sharp, while moving figures become ghostly blurs.
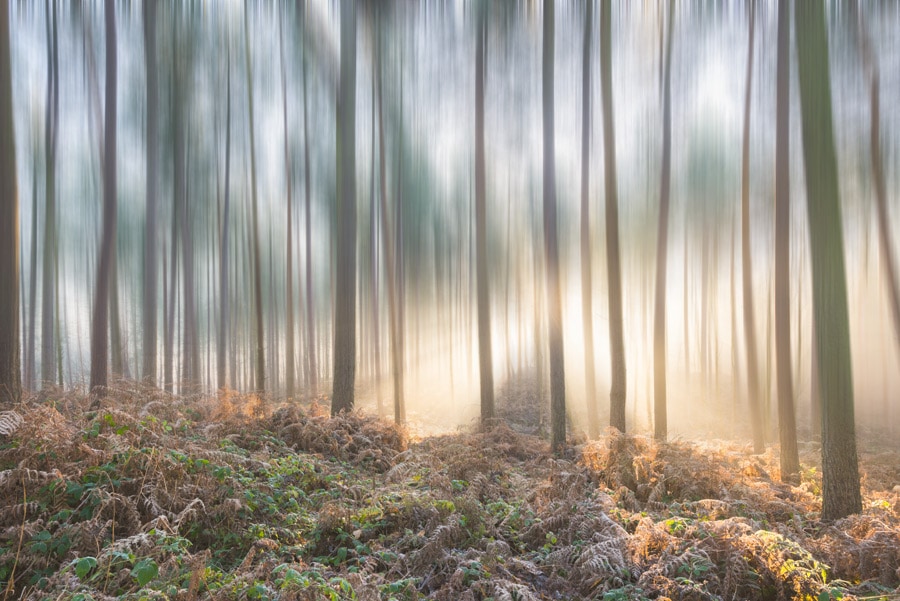
- Intentional Camera Movement: During the exposure, gently move the camera up, down, or sideways. This can create abstract patterns from city lights, trees, or architecture.
For more advanced ideas, consider reading the motion blur cinematic photography guide, which explores how to use these effects for a more dramatic, film-inspired look.
Gear Recommendations for Night Shoots
While any camera capable of manual controls can be used, certain equipment will make capturing motion blur at night much easier and more consistent:
- Tripod: A sturdy tripod is essential for sharp, stable shots during long exposures.
- Remote Shutter Release: This prevents vibrations caused by pressing the shutter button. Alternatively, use your camera’s self-timer.
- Wide-Angle Lens: These lenses allow you to capture more of the scene and often perform well in low light.
- ND Filters: In urban areas with lots of artificial light, a neutral density filter can help you achieve longer exposures without overexposing the image.
Don’t forget to dress appropriately for nighttime conditions and keep spare batteries handy, as long exposures can drain power quickly.
Compositional Tips for Dynamic Night Images
The success of motion blur in night photography often depends on thoughtful composition. Here are some ways to enhance your images:
- Lead the Eye: Use light trails or blurred movement to guide viewers through the frame.
- Contrast Static and Moving Elements: Combine sharp, stationary subjects with blurred motion for visual interest.
- Frame for Context: Include recognizable landmarks or cityscapes to give a sense of place.
- Experiment with Angles: Shooting from above, below, or at street level can dramatically change the impact of moving lights and subjects.
For a deeper dive into how different approaches affect your results, the motion blur before and after examples guide provides side-by-side comparisons.
Post-Processing and Refinement
Editing plays a key role in perfecting your night images. Start by adjusting exposure, contrast, and white balance to bring out details in both highlights and shadows. Use noise reduction tools to minimize grain, especially in darker areas. If you want to enhance the sense of movement, selectively increase clarity and sharpness on static elements while leaving blurred areas soft.
Cropping can also help you refine your composition, focusing attention on the most dynamic parts of the image. Don’t be afraid to experiment with color grading—cooler tones often complement night scenes, while warmer hues can add energy to light trails and movement.
For inspiration, check out this collection of beautiful motion blur photos from photographers around the world.
Frequently Asked Questions
What shutter speed should I use for light trails at night?
For pronounced light trails, exposures between 5 and 30 seconds are common. The exact time depends on traffic speed, ambient light, and your creative goals. Start with 10 seconds and adjust as needed.
How do I avoid unwanted camera shake during long exposures?
Always use a tripod and, if possible, a remote shutter release or your camera’s self-timer. This minimizes vibrations that can blur stationary elements in your photo.
Can I achieve motion blur effects without a tripod?
While a tripod is ideal, you can sometimes stabilize your camera on a solid surface like a wall or bench. For intentional camera movement techniques, handholding is actually encouraged to create abstract effects.