

If you’re just starting out in digital photography or image editing, you may have come across the term motion blur filter explained and wondered what it actually means. This effect is a powerful tool in both photography and graphic design, allowing you to simulate movement, add energy, or create a sense of speed in your images. Understanding how to use and control motion blur can help you transform static photos into dynamic visuals that grab attention.
In this guide, you’ll learn the basics of motion blur, how the filter works in popular editing software, and practical tips for beginners. We’ll also look at creative uses and common mistakes to avoid, so you can confidently experiment with this effect in your own projects. For those interested in seeing real-world applications, you might also want to check out motion blur composition examples for inspiration.
What Is a Motion Blur Filter?
The motion blur filter is a digital effect that mimics the streaking or smearing seen in photos of moving objects. In real-world photography, motion blur occurs when the camera’s shutter speed is slow relative to the speed of the subject, causing moving elements to appear blurred along their path of travel. Digital editing software like Photoshop, GIMP, and other image editors offer motion blur filters to replicate this effect artificially.
When you apply a motion blur filter, the software averages pixels along a specified direction and distance, creating the illusion that part of the image is moving. This can be used to highlight action, suggest speed, or add artistic flair to otherwise static images.
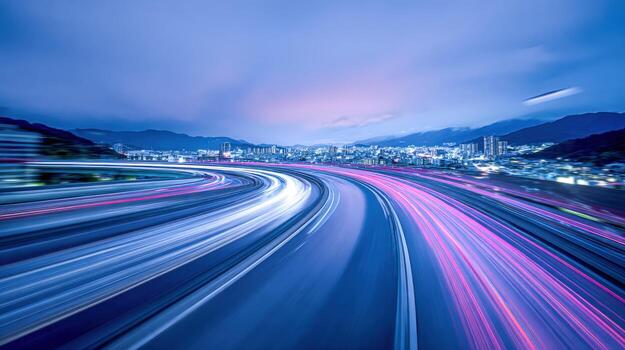
How the Motion Blur Effect Works in Editing Software
Most image editing programs include a motion blur option within their filter menus. The basic controls typically let you set:
- Angle or Direction: Determines the path along which the blur is applied (horizontal, vertical, diagonal, or custom angle).
- Distance or Strength: Controls how far the blur extends from the original pixels, affecting the intensity of the effect.
For example, in Adobe Photoshop, you can find the motion blur filter under Filter > Blur > Motion Blur. Adjusting the angle aligns the blur with the direction of movement you want to simulate, while the distance slider increases or decreases the length of the blur streaks. Other programs may use slightly different terminology, but the core principles remain the same.
For a deeper dive into the technical side and creative uses of this effect, Adobe provides a helpful overview in their motion blur photography resource.
Creative Applications for Beginners
Understanding the motion blur filter explained concept opens up a range of creative possibilities. Here are some common ways beginners use this effect:
- Simulating Speed: Add a sense of rapid movement to cars, runners, or cyclists in your photos.
- Directing Attention: Blur backgrounds or surroundings to keep the viewer’s focus on the main subject.
- Artistic Effects: Create dreamy, surreal, or abstract images by blurring parts of a photo intentionally.
- Enhancing Action Shots: Make sports or dance photos more dynamic by emphasizing movement.
Experimenting with different angles and distances can help you achieve a variety of looks, from subtle motion to dramatic streaks. If you’re looking for more inspiration, explore motion blur creative inspiration to see how artists use this filter in unique ways.
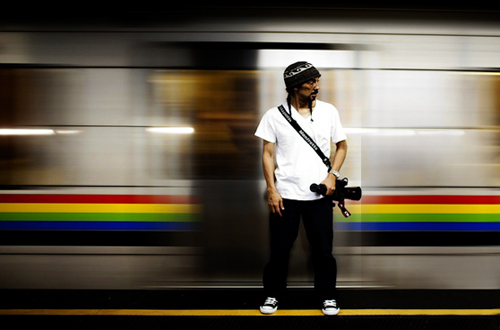
Tips for Getting the Best Results with Motion Blur
Applying a motion blur filter can be straightforward, but achieving a realistic or visually appealing result takes some practice. Here are some tips to help you get started:
- Match the Direction: Always align the blur angle with the actual or intended movement in the photo. If a car is moving left to right, set the angle horizontally.
- Use Layer Masks: Apply the blur to a duplicate layer, then use a mask to reveal or hide the effect in specific areas. This allows for more control and subtlety.
- Adjust Opacity: Lower the opacity of the blurred layer to blend it naturally with the original image.
- Combine with Other Effects: For advanced results, combine motion blur with sharpening, color adjustments, or other filters.
For a step-by-step approach tailored to new users, the motion blur settings for beginners guide provides detailed instructions and screenshots.
Common Mistakes to Avoid
While experimenting is encouraged, beginners often make a few mistakes when using the motion blur filter:
- Overdoing the Effect: Excessive blur can make an image look unnatural or confusing. Start with subtle settings and increase gradually.
- Ignoring Light and Shadows: If the blur doesn’t match the lighting or shadows in the scene, the result may appear fake.
- Blurring the Wrong Elements: Only blur objects that are supposed to be moving. Blurring stationary backgrounds can reduce realism.
- Forgetting to Save Originals: Always work on a copy of your image so you can revert if needed.
Comparing Motion Blur with Other Blur Filters
It’s important to distinguish the motion blur filter explained concept from other types of blur effects. Here’s a quick comparison:
| Filter Type | Purpose | Common Uses |
|---|---|---|
| Motion Blur | Simulates movement in a specific direction | Action shots, speed effects |
| Gaussian Blur | Softens the entire image evenly | Background blur, skin smoothing |
| Radial Blur | Creates circular or zooming blur from a center point | Spinning wheels, zoom effects |
Choosing the right blur filter depends on the story you want your image to tell. Motion blur is best for simulating movement, while other blurs serve different creative purposes.
Practical Examples and Inspiration
Seeing the effect in action can help you understand its potential. Browse through motion blur before and after examples to see how subtle changes can dramatically alter a photo’s mood and impact. You’ll notice that even a small amount of blur can add depth, focus, and excitement to an image.
For those interested in cinematic styles, the motion blur cinematic photography guide explores how filmmakers and photographers use this technique to create drama and emotion.
Frequently Asked Questions
What is the main purpose of using a motion blur filter?
The primary goal is to simulate or enhance the appearance of movement in an image. This can make photos look more dynamic, direct the viewer’s attention, or add artistic effects that convey speed and energy.
Can I use motion blur on any type of photo?
While you can technically apply the filter to any image, it works best on photos where some element is supposed to be moving. Using it on static scenes may result in unnatural or confusing visuals.
How do I avoid making my image look fake when using motion blur?
To keep results realistic, match the blur direction to the actual motion, use subtle settings, and blend the effect with layer masks or opacity adjustments. Pay attention to lighting and context within the image.
Is motion blur only for photography, or can it be used in graphic design?
This effect is widely used in both photography and graphic design. In design, it can add energy to backgrounds, create visual interest in banners or ads, and simulate movement in illustrations or composites.
Where can I learn more about advanced motion blur techniques?
For more in-depth tutorials, resources like Adobe’s motion blur photography guide and various online courses provide step-by-step instructions and creative ideas.