Capturing motion blur with mirrorless camera systems has become a popular way to add energy and artistry to photographs. This effect, where moving subjects appear blurred while stationary objects remain sharp, can transform ordinary scenes into dynamic visual stories. Thanks to the advanced features of modern mirrorless cameras, achieving this look is more accessible than ever for both beginners and experienced photographers.
Whether you want to convey speed, create dreamy landscapes, or highlight movement in urban environments, understanding how to control blur is essential. This article explores practical methods, recommended settings, and creative ideas for producing stunning motion effects with your mirrorless gear. For those seeking further inspiration, you might also enjoy browsing motion blur composition examples to see how other photographers approach this technique.
Understanding Motion Blur in Photography
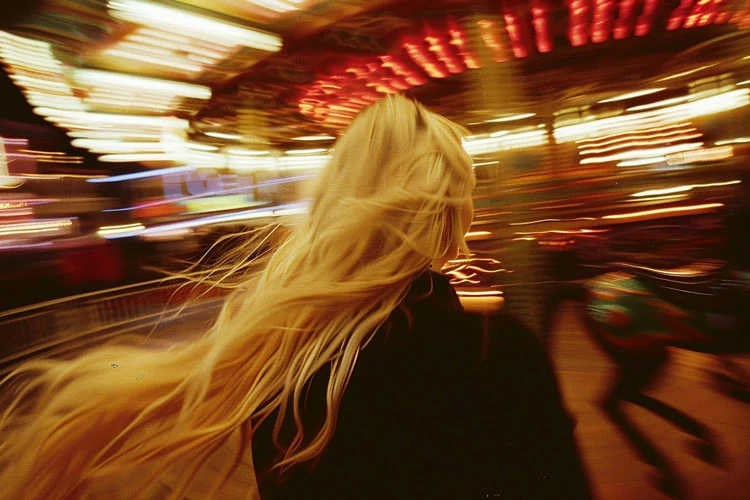
Motion blur occurs when a moving subject is captured with a slow shutter speed, causing it to streak across the frame. This effect can be used intentionally to suggest movement, emphasize speed, or produce abstract visuals. Mirrorless cameras, with their real-time electronic viewfinders and advanced autofocus, make it easier to preview and control this effect before pressing the shutter.
There are two main types of motion blur:
- Subject blur: The subject moves during the exposure, while the background remains sharp.
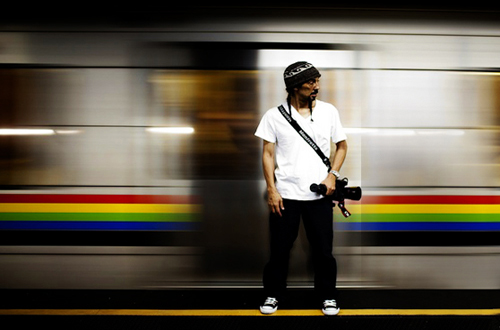
- Background blur (panning): The camera follows the moving subject, keeping it sharp while blurring the background.
Both styles can be achieved using a mirrorless camera by adjusting shutter speed and camera movement.
Essential Gear for Capturing Dynamic Scenes
While you can experiment with motion blur using almost any mirrorless camera, certain gear can make the process smoother and more predictable:
- Tripod: Stabilizes the camera for long exposures, especially when you want stationary elements to remain crisp.
- ND Filters: Neutral density filters reduce the amount of light entering the lens, allowing for slower shutter speeds even in bright conditions.
- Remote Shutter Release: Minimizes camera shake during long exposures.
- Fast Lenses: Lenses with wide apertures (like f/1.8 or f/2.8) give you more creative control over depth of field and exposure.
Mirrorless systems are particularly well-suited for these techniques due to their compact size and advanced stabilization features.
Camera Settings for Motion Blur with Mirrorless Camera Systems
Getting the right settings is crucial for achieving the desired blur effect. Here are the key parameters to adjust:
- Shutter Speed: The most important factor. Slower speeds (1/30s, 1/10s, or even several seconds) increase blur. The exact value depends on subject speed and desired effect.
- Aperture: A smaller aperture (higher f-number) lets you use slower shutter speeds without overexposing. However, a wide aperture can help isolate your subject.
- ISO: Keep ISO as low as possible to reduce noise, especially during long exposures.
- Stabilization: Use in-body or lens stabilization for handheld shots, or turn it off when using a tripod for maximum sharpness of static elements.
Many mirrorless cameras offer live previews of exposure and blur, making it easier to fine-tune your settings before capturing the shot. For a more detailed walkthrough on setup, the motion blur settings for beginners guide is a helpful resource.
Creative Techniques for Artistic Motion Blur
Once you understand the basics, you can experiment with different approaches to make your images stand out:
- Panning: Track a moving subject (like a cyclist or car) with your camera while using a slow shutter speed. This keeps the subject relatively sharp while blurring the background, emphasizing motion.
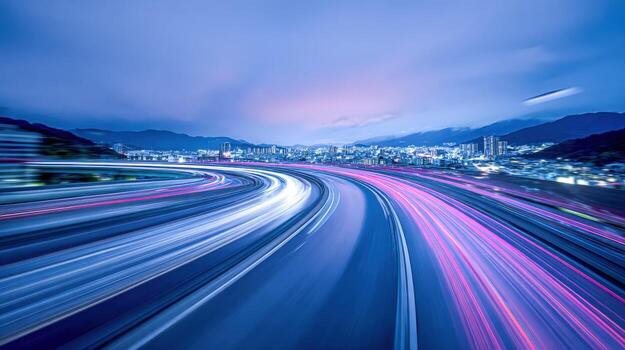
- Long Exposures: Use exposures of several seconds to capture flowing water, moving crowds, or light trails at night. A tripod is essential for this method.
- Intentional Camera Movement (ICM): Move the camera during the exposure to create abstract patterns and painterly effects.
- Multiple Exposures: Some mirrorless cameras allow you to combine several exposures in-camera for layered motion effects.
Experimenting with these techniques can lead to unique and visually compelling results.
Common Challenges and How to Overcome Them
While producing motion blur with a mirrorless camera is straightforward, there are a few common issues to watch out for:
- Overexposure: Slow shutter speeds can lead to blown highlights, especially in daylight. Use ND filters, smaller apertures, or lower ISO to compensate.
- Unwanted Camera Shake: Even slight movements can blur the entire frame. Use a tripod and remote release for static scenes, or practice steady panning for moving subjects.
- Focus Issues: Autofocus may struggle in low light or with fast-moving subjects. Pre-focus on a spot or switch to manual focus if needed.
- Subject Disappearance: If your shutter speed is too slow, fast-moving subjects may become too faint or disappear entirely. Adjust speed to balance blur and visibility.
Patience and practice are key. Review your images on the camera’s display and make incremental adjustments to improve your results.
Post-Processing Tips for Enhanced Motion Effects
Editing can help you refine your motion blur images and correct minor issues. Here are some suggestions:
- Contrast and Clarity: Boost contrast to make blurred and sharp areas stand out.
- Selective Sharpening: Apply sharpening only to static elements or the main subject.
- Noise Reduction: Long exposures can introduce noise, especially at higher ISOs. Use your editing software’s noise reduction tools.
- Cropping: Adjust composition to emphasize movement and remove distractions.
For more advanced editing techniques and creative ideas, the Adobe guide to motion blur photography offers in-depth tutorials and inspiration.
Inspiration and Next Steps
Exploring new ways to capture movement can open up a world of creative possibilities. If you’re looking for more ideas, check out the motion blur cinematic photography guide for tips on achieving a dramatic, film-inspired look, or browse motion blur creative inspiration for artistic approaches from other photographers. Comparing your work with motion blur before and after examples can also help you refine your technique and see the impact of different settings.
With practice and experimentation, you’ll develop your own style and learn how to use motion blur to tell compelling visual stories.
Frequently Asked Questions
What shutter speed should I use for motion blur with a mirrorless camera?
The ideal shutter speed depends on your subject and the amount of blur you want. For subtle movement, try 1/30s to 1/60s. For dramatic streaks, use 1/10s or slower. Fast-moving subjects may require even shorter exposures to remain visible. Experiment and review your results to find the best setting for your scene.
Do I need a tripod for motion blur photography?
A tripod is highly recommended for long exposures or when you want stationary elements to remain sharp. For panning shots, you can shoot handheld, but practice smooth camera movement to avoid unwanted shake. Some mirrorless cameras offer excellent in-body stabilization, which can help for shorter exposures.
How can I avoid overexposing my photos when using slow shutter speeds?
To prevent overexposure, use a low ISO setting, a smaller aperture (higher f-number), or attach a neutral density (ND) filter to your lens. ND filters are especially useful in bright conditions, as they allow you to use slower shutter speeds without letting in too much light.