Motion blur indoor photography offers a creative way to capture movement and atmosphere in low-light environments. Whether you want to convey the energy of a bustling event, the elegance of a dancer, or the subtle motion of everyday life, mastering the right camera settings is essential. Indoor conditions present unique challenges, such as limited light and unpredictable movement, making it crucial to understand how to balance exposure, sharpness, and artistic intent.
In this guide, you’ll learn how to set up your camera for compelling motion blur effects indoors. We’ll cover the best shutter speeds, ISO, aperture choices, and practical tips for both beginners and experienced photographers. For those seeking more creative ideas, you can also explore motion blur creative inspiration to expand your artistic approach.
Understanding Motion Blur in Indoor Environments
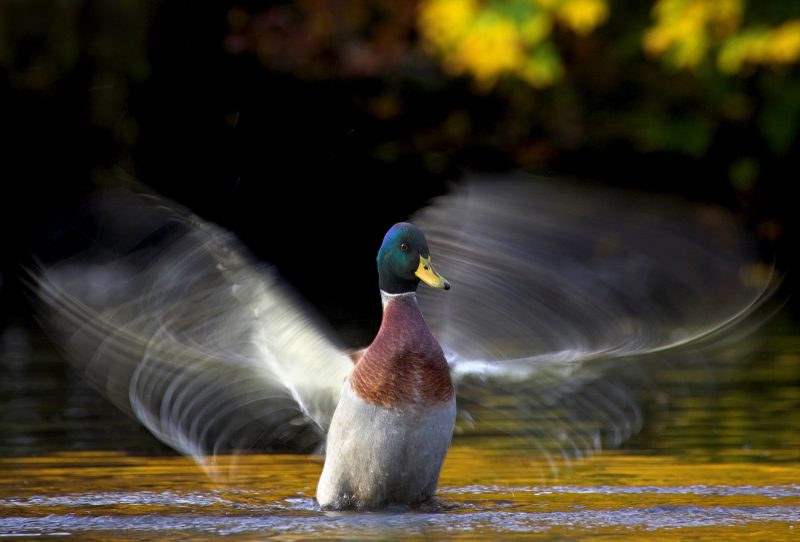
Capturing motion blur indoors is about intentionally allowing moving subjects to appear streaked or blurred, while static elements remain sharp. This effect can evoke a sense of movement, energy, or even mystery. However, indoor settings often have less available light, which means you’ll need to adjust your camera settings to avoid underexposed images while still achieving the desired blur.
Some photographers use motion blur to highlight the contrast between stillness and movement, such as a musician’s hands in action or people walking through a gallery. The key is to control the amount of blur by adjusting your shutter speed and compensating with other exposure settings.
Essential Camera Settings for Indoor Motion Blur
To create effective motion blur in indoor photography, you need to balance three main settings: shutter speed, aperture, and ISO. Each plays a role in how much light reaches the sensor and how movement is rendered in your photos.
Shutter Speed: The Key to Capturing Movement
Shutter speed determines how long your camera’s sensor is exposed to light. For motion blur indoor photography, slower shutter speeds are necessary to capture movement. Typical settings range from 1/15 to 1/2 second, depending on how fast your subject is moving and how much blur you want. For subtle motion, try 1/30 or 1/15 second. For dramatic streaks, go slower, but be mindful of camera shake.
Using a tripod or stabilizing your camera is highly recommended to keep stationary objects sharp while allowing only the moving elements to blur.
Aperture and ISO: Balancing Exposure Indoors
Since slower shutter speeds let in less light, you’ll need to compensate with a wider aperture (lower f-number) and/or higher ISO. A wide aperture, such as f/1.8 or f/2.8, allows more light to reach the sensor, which helps maintain proper exposure. However, this also reduces depth of field, so focus carefully on your subject.
Increasing ISO makes your camera more sensitive to light, but be cautious—higher ISO can introduce noise, especially in dimly lit indoor settings. Modern cameras handle ISO 1600 or even 3200 well, but always check your images for grain and adjust as needed.
White Balance and Color Accuracy
Indoor lighting can range from warm tungsten bulbs to cool fluorescent lights, affecting the color balance of your photos. Set your camera’s white balance to match the ambient light, or shoot in RAW format so you can fine-tune colors during editing. This ensures that your motion blur images retain natural and pleasing tones.
Techniques for Creative Indoor Motion Blur
Beyond the basic settings, several techniques can help you achieve more dynamic and visually interesting results:
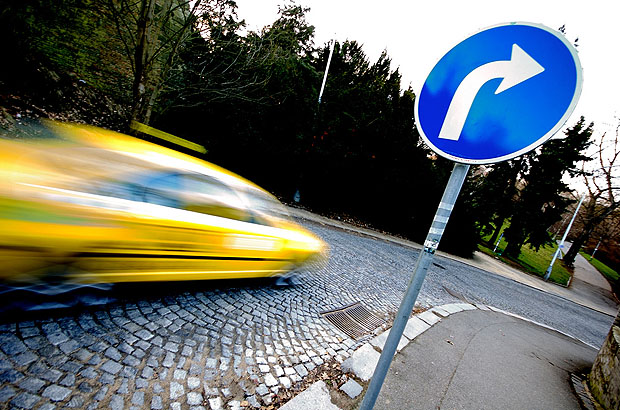
- Panning: Move your camera along with the moving subject while using a slow shutter speed. This keeps the subject relatively sharp while blurring the background, emphasizing speed and direction.
- Zoom Burst: Twist the zoom ring during exposure to create radial blur effects, often used for artistic or abstract images.
- Intentional Camera Movement (ICM): Deliberately move the camera in a controlled way—up, down, or sideways—while the shutter is open to create painterly effects.
Experimenting with these methods can add variety to your portfolio. For more inspiration, check out motion blur composition examples that demonstrate different creative approaches.

Practical Tips for Better Results
- Use a tripod or stable surface to prevent unwanted camera shake, especially at shutter speeds slower than 1/30 second.
- Enable image stabilization if your lens or camera body supports it, which can help reduce blur from minor hand movements.
- Pre-focus manually or use continuous autofocus to keep your subject sharp, especially in low-light conditions where autofocus may struggle.
- Take multiple shots to increase your chances of capturing the perfect blend of sharpness and blur.
- Review your images on the camera’s LCD and adjust settings as needed—don’t be afraid to experiment with different shutter speeds and compositions.
For those just starting out, the motion blur settings for beginners guide offers a step-by-step introduction to these techniques.
Common Challenges and How to Overcome Them
Indoor motion blur photography comes with its own set of obstacles. Here are some typical issues and solutions:
- Low light causing underexposure: Open your aperture wider, increase ISO, or add supplemental lighting if possible.
- Unwanted camera shake: Always use a tripod or rest your camera on a solid surface. Consider using a remote shutter release or the camera’s self-timer to avoid movement when pressing the shutter button.
- Too much noise at high ISO: Use noise reduction features in your camera or edit images in post-processing. Try to keep ISO as low as possible while maintaining proper exposure.
- Color casts from artificial lighting: Adjust white balance in-camera or correct it later if shooting in RAW.
Learning to anticipate and address these challenges will help you consistently achieve high-quality results.
Editing and Post-Processing Motion Blur Photos
Post-processing is an important step in refining your indoor motion blur images. Use editing software to adjust exposure, contrast, and color balance. If noise is present due to high ISO, apply noise reduction carefully to preserve detail. Cropping can also help improve composition and remove distracting elements.
For more advanced editing, consider selectively sharpening static areas while leaving blurred regions soft, enhancing the sense of movement. This can be done using layer masks in programs like Adobe Photoshop or Lightroom.
If you want to see how editing can transform your images, explore motion blur before and after examples for real-world demonstrations.
Further Learning and Resources
To deepen your understanding of motion blur techniques, there are many resources available. For a comprehensive overview of the topic, visit this in-depth guide to motion blur photography, which covers both technical and creative aspects.
Continued practice and experimentation are the best ways to master these skills. Don’t hesitate to try new settings, review your results, and seek inspiration from other photographers.
FAQ
What shutter speed should I use for indoor motion blur?
The ideal shutter speed depends on your subject’s movement and the amount of blur you want. For subtle effects, start with 1/30 or 1/15 second. For more pronounced blur, try slower speeds like 1/8 or 1/4 second. Always test and adjust based on your lighting and subject.
How can I avoid unwanted camera shake when shooting indoors?
Use a tripod or place your camera on a stable surface. If you don’t have a tripod, brace yourself against a wall or table. Enable image stabilization if available, and use a remote shutter release or self-timer to minimize movement when taking the shot.
Is it possible to achieve motion blur indoors without a tripod?
Yes, but it’s more challenging. Use the shortest possible shutter speed that still gives you the desired blur, and stabilize your camera as much as possible. Lean against a solid object or rest your elbows on a surface. Increasing ISO and opening the aperture can help you use faster shutter speeds while still capturing motion.