The motion blur double exposure effect is a creative photography and editing technique that combines the dynamic energy of motion blur with the layered storytelling of double exposure. This hybrid style allows photographers and digital artists to blend two images—often one sharp and one blurred—to produce visually striking compositions that evoke movement, emotion, and depth. Whether you’re a beginner or an experienced creator, understanding how to achieve this effect can open up new avenues for artistic expression.
In this article, you’ll learn the fundamentals of this visual style, practical steps for creating it, and tips for refining your results. We’ll also highlight inspirational examples and point you to additional resources for mastering related techniques. For those interested in exploring more creative ideas, check out these motion blur creative inspiration examples to spark your imagination.

Understanding the Motion Blur Double Exposure Technique
At its core, this effect merges two photographic concepts:
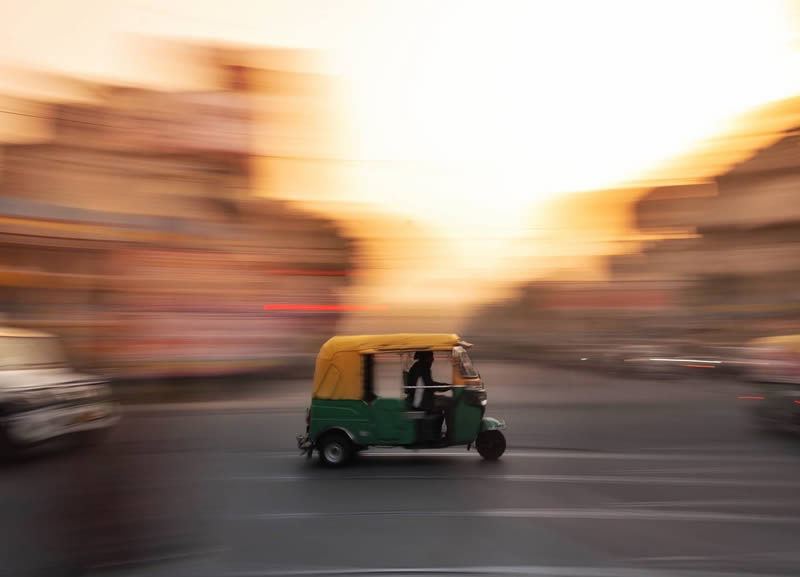
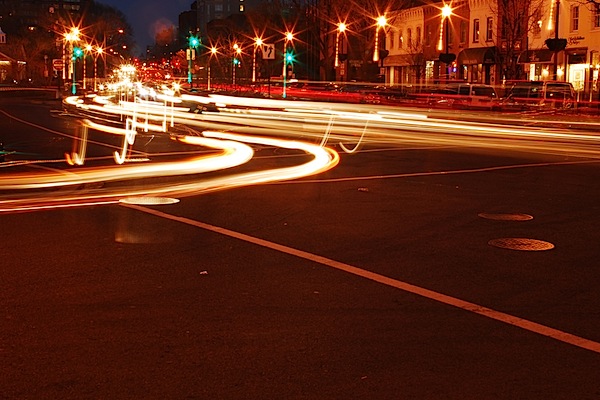
- Motion blur: Achieved by using a slow shutter speed to capture movement, resulting in streaks or trails that suggest action.
- Double exposure: The process of layering two images, either in-camera or digitally, to create a composite with elements from both photos visible.
When combined, these methods allow for the creation of images where a subject—often a person or object—appears both sharply defined and dynamically blurred, sometimes within the same frame. This can communicate a sense of time passing, emotional intensity, or dreamlike narrative.
Essential Equipment and Camera Settings
To capture the raw materials for this effect, you’ll need:
- A camera with manual controls (DSLR, mirrorless, or advanced compact)
- A sturdy tripod to prevent unwanted shake during long exposures
- Remote shutter release or self-timer (optional, but helpful)
For the motion blur component, set your camera to shutter priority or manual mode. Typical settings include:
- Shutter speed: 1/10 to several seconds, depending on subject speed and available light
- Aperture: Adjust to maintain correct exposure (smaller apertures like f/8 or f/11 help with depth of field)
- ISO: Keep as low as possible to minimize noise
Take one photo with intentional blur (by moving the camera or having your subject move) and another with the subject in sharp focus. These two images will form the basis for your composite.
Creating the Composite: Digital Workflow
While some cameras offer in-camera double exposure modes, most artists use photo editing software for greater control. Adobe Photoshop is a popular choice, but similar results can be achieved in GIMP, Affinity Photo, or other editors that support layers and masking.
- Import both images: Open your sharp and blurred photos as separate layers in your editing program.
- Align the layers: If needed, use the move tool to align the subject in both layers for a seamless blend.
- Set blend mode: Change the top layer’s blend mode to “Lighten,” “Screen,” or “Overlay” to reveal parts of both images. Experiment to see which mode best fits your creative vision.
- Mask and refine: Add a layer mask to the top image. Use a soft brush to paint black on the mask, revealing the blurred layer beneath in selected areas. This step allows you to control exactly where the motion blur appears.
- Adjust tones and colors: Fine-tune brightness, contrast, and color balance to unify the composite and enhance mood.
- Export your final image: Save your work in a high-resolution format for sharing or printing.
For a detailed walkthrough of capturing and editing blurred images, see this comprehensive guide to capturing motion blur in photography.
Creative Ideas for Motion Blur Double Exposure Projects
This technique offers endless possibilities for experimentation. Here are a few creative directions to try:
- Portraits with movement: Combine a sharp portrait with a blurred version of the same subject in motion, such as hair flipping, walking, or dancing.
- Urban scenes: Layer a static cityscape with blurred traffic or crowds to convey the energy of city life.
- Nature and wildlife: Blend a crisp animal or plant image with a blurred background of wind, water, or swaying foliage.
- Abstract art: Use intentional camera movement (ICM) for the blur layer, then overlay with a sharply focused object or silhouette.
For more visual examples and inspiration, browse these motion blur composition examples that showcase the diversity of this approach.
Tips for Refining Your Results
To make your composites stand out, keep these practical tips in mind:
- Plan your shots: Think ahead about how your two images will interact. Consistent lighting and perspective help the blend look natural.
- Use subtlety: Sometimes less is more. A gentle hint of blur can be more effective than overwhelming the image with motion.
- Experiment with color: Try converting one or both layers to black and white, or use color grading to create mood and cohesion.
- Mind the edges: Use soft brushes and gradual transitions on your masks to avoid harsh lines between layers.
- Practice: The more you experiment, the more you’ll develop your own style and discover new possibilities.
Beginners can benefit from reviewing this motion blur settings for beginners guide for foundational camera techniques.
Common Mistakes and How to Avoid Them
- Overexposure: Long exposures can easily blow out highlights. Use a neutral density filter or shoot in lower light to maintain detail.
- Misaligned layers: If your subject shifts between shots, use editing tools to align layers or embrace the offset as a creative element.
- Unnatural blends: Pay attention to lighting direction and color temperature in both images for a believable composite.
- Ignoring composition: Even with creative effects, strong composition remains essential for impactful images.
FAQ
What is the best software for creating motion blur double exposure effects?
Adobe Photoshop is the most popular choice due to its advanced layer and masking capabilities. However, free alternatives like GIMP or paid options such as Affinity Photo can also produce excellent results. The key is using software that supports layers, blend modes, and masks.
Can I achieve this effect in-camera, or is editing always required?
Some modern cameras offer built-in double exposure modes, allowing you to combine two exposures directly in-camera. However, achieving precise control over the blend and masking is usually easier in post-processing. In-camera techniques can be fun for experimentation, but editing provides more flexibility.
How do I choose the right images to combine?
Look for photos with similar lighting and perspective. One image should have strong motion blur, while the other should be sharply focused. Subjects with clear outlines, such as people or animals, often work well. Experiment with different combinations to see what creates the most compelling visual story.
Further Resources and Inspiration
To deepen your understanding and expand your creative toolkit, explore these additional guides:
For more technical advice, the Digital Photography School’s guide to capturing motion blur offers practical tips on exposure and movement.
By mastering the motion blur double exposure effect, you can add a new dimension to your photography and digital art. With practice, planning, and a willingness to experiment, this technique can help you tell more dynamic and emotionally resonant visual stories.