
Capturing motion blur for beginners can transform ordinary photos into dynamic, eye-catching images. Whether you’re interested in photographing city lights, flowing water, or fast-moving subjects, learning how to create this effect is a valuable skill for any aspiring photographer. This guide breaks down the basics, explains the essential camera settings, and provides practical tips to help you get started with motion blur photography.
If you want to see creative ways to use this technique, check out these motion blur composition examples for inspiration.
Understanding the Basics of Motion Blur
At its core, motion blur is the visible streaking or smearing of moving objects in a photograph. This effect occurs when the camera’s shutter stays open long enough to record movement. Instead of freezing the action, you intentionally allow motion to be captured, resulting in a sense of speed or flow.
The technique is widely used in sports, street, landscape, and creative photography. It can highlight movement, add drama, or create abstract compositions. For those new to the concept, mastering motion blur is about understanding how to control your camera’s exposure settings and using them to your advantage.
Essential Camera Settings for Beginners
Getting started with motion blur photography doesn’t require expensive gear. Most digital cameras, including entry-level DSLRs, mirrorless models, and even some smartphones, offer the necessary controls. Here are the key settings to focus on:
- Shutter Speed: The most important factor. Slower shutter speeds (such as 1/30s, 1/10s, or even several seconds) allow more movement to be recorded. The exact speed depends on your subject and desired effect.
- Aperture: A smaller aperture (higher f-number) can help prevent overexposure when using slow shutter speeds, especially in bright conditions.
- ISO: Keep ISO as low as possible to reduce noise, since longer exposures can introduce grain.
- Stabilization: Use a tripod or stable surface to keep the camera steady during long exposures, unless you want to intentionally blur the entire frame.
For a deeper dive into camera adjustments, the motion blur settings for beginners guide covers recommended values and troubleshooting tips.
Popular Techniques for Capturing Motion Blur
There are several creative approaches to capturing movement in your photos. Here are a few techniques that are especially accessible for those just starting out:
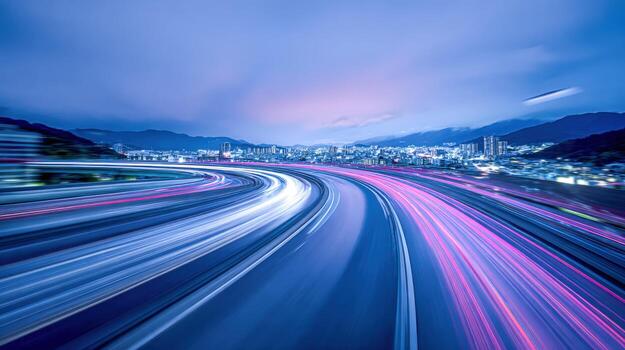
Light Trails and Night Photography
Photographing moving lights, such as car headlights or city traffic at night, is a classic way to experiment with motion blur. Set your camera on a tripod, use a slow shutter speed (often several seconds), and watch as moving lights create colorful streaks across your frame.
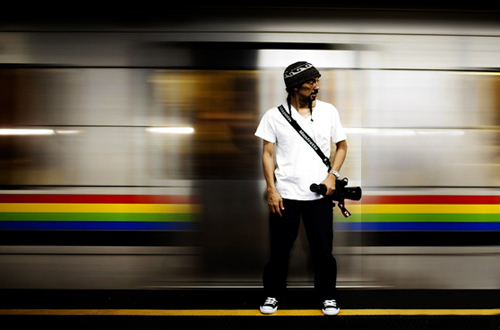
Panning for Dynamic Action Shots
Panning involves moving your camera along with a moving subject, such as a cyclist or runner, during a slow exposure. This keeps the subject relatively sharp while blurring the background, emphasizing speed and direction. Practice is key—start with a shutter speed around 1/30s and adjust as needed.
Blurring Water and Clouds
Slow shutter speeds can turn flowing water into a silky, smooth surface or create dreamy streaks in moving clouds. For daytime shots, you may need a neutral density (ND) filter to reduce the amount of light entering the lens, allowing for longer exposures without overexposing the image.
Tips for Achieving Great Results with Motion Blur
- Plan Your Shot: Think about the direction and speed of your subject. The more predictable the movement, the easier it is to capture a clean blur.
- Use Manual or Shutter Priority Mode: These modes give you direct control over exposure time, which is crucial for this technique.
- Take Multiple Shots: Experiment with different shutter speeds and compositions. Digital photography makes it easy to review and adjust on the fly.
- Mind the Lighting: Low light conditions are often ideal, but you can use ND filters or adjust aperture and ISO to shoot in brighter environments.
- Review and Refine: After shooting, review your images and note what worked. Compare your results with motion blur before and after examples to see how small adjustments can make a big difference.
Common Mistakes and How to Avoid Them
Beginners often encounter a few pitfalls when learning to photograph motion. Here are some frequent issues and solutions:
- Unintentional Camera Shake: Always use a tripod or stable surface unless you want to blur the entire image.
- Overexposure: Slow shutter speeds let in more light. Compensate with a smaller aperture, lower ISO, or ND filters.
- Subject Too Blurry: If your subject is unrecognizable, try a slightly faster shutter speed or practice your panning technique.
- Focus Issues: Use manual focus or pre-focus on the spot where you expect the action to happen.
Creative Inspiration and Next Steps
Once you’re comfortable with the fundamentals, explore more advanced approaches. For cinematic looks, the motion blur cinematic photography guide offers techniques for storytelling and mood. If you’re sharing your work online, consider these motion blur Instagram photography tips to help your images stand out.
For a broader overview and expert advice, Adobe’s resource on motion blur photography covers both technical and creative aspects.
Frequently Asked Questions
What is the ideal shutter speed for motion blur photos?
The best shutter speed depends on your subject and the amount of blur you want. For moving vehicles or people, start around 1/30s to 1/10s. For light trails or flowing water, exposures of several seconds may be needed. Experiment with different speeds to achieve the effect you like.
Do I need special equipment to capture motion blur?
While a tripod is highly recommended for sharp backgrounds, you don’t need expensive gear. Most cameras with manual or shutter priority modes will work. ND filters can help in bright conditions, but are optional for beginners.
How can I avoid overexposed images when using slow shutter speeds?
Use a smaller aperture (higher f-number), lower your ISO, and consider shooting during low light times like early morning or evening. If you want to shoot in bright daylight, an ND filter can help reduce the light entering your lens, allowing for longer exposures without overexposing.