Motion blur in filmmaking is a visual effect that occurs when objects move rapidly within a frame, causing them to appear streaked or smeared. This phenomenon is not just a technical artifact—it’s a creative tool that filmmakers use to convey speed, emotion, and realism. Understanding how and why motion blur happens, and how to control it, is essential for anyone interested in cinematography, editing, or visual storytelling.
Whether you’re a beginner experimenting with your first camera or a seasoned professional aiming to refine your style, grasping the principles behind motion blur can elevate your work. For those seeking inspiration, you might find motion blur composition examples helpful for visual reference and creative ideas.
What Is Motion Blur and Why Does It Occur?
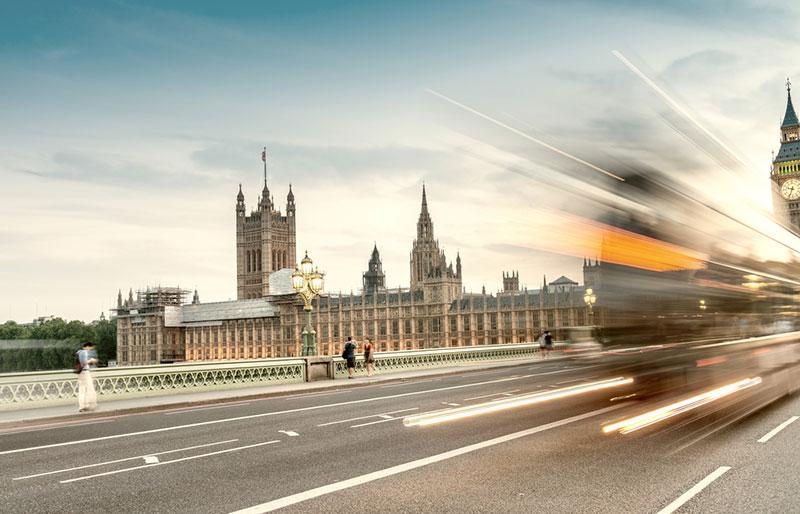
At its core, motion blur is the streaking of moving objects in a sequence of images or video frames. It results from the movement of the subject, the camera, or both during the exposure time of each frame. In the world of filmmaking, this effect is most noticeable when shooting fast action scenes or when the camera itself is panning quickly.
The primary factors influencing motion blur are:
- Shutter speed: A slower shutter speed allows more time for movement within a frame, increasing blur.
- Frame rate: The number of frames captured per second can affect the smoothness and intensity of the blur.
- Movement: The speed and direction of the subject or camera play a significant role.
In digital cinematography, the standard shutter angle is 180 degrees, which produces a natural-looking blur that mimics what the human eye expects. Deviating from this standard can create either a choppy, staccato effect (with less blur) or a dreamy, smeared look (with more blur).
Creative Uses of Motion Blur in Visual Storytelling
Filmmakers often use motion blur intentionally to enhance the emotional impact of a scene. For example, in action films, a controlled amount of blur can make fight sequences feel more dynamic and realistic. In contrast, reducing blur can create a sense of urgency or disorientation, as seen in films like “Saving Private Ryan” during its intense battle scenes.
Here are some creative ways directors and cinematographers leverage this effect:
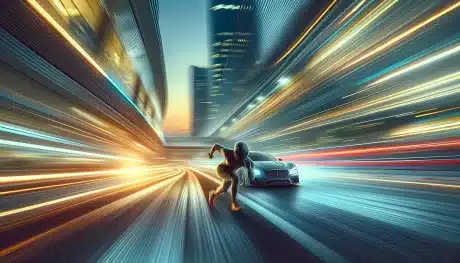
- Conveying speed: Racing cars, running characters, or fast-moving objects appear more dramatic with visible blur trails.
- Expressing emotion: Dream sequences or memories often use exaggerated blur to create a surreal atmosphere.
- Directing attention: By blurring background elements, filmmakers can guide the viewer’s focus to the subject.
- Simulating point of view: Handheld shots with motion blur can immerse audiences in a character’s experience.
For those interested in exploring more artistic approaches, the motion blur creative inspiration guide provides additional ideas and examples.
Technical Factors Affecting Motion Blur in Filmmaking
Achieving the right amount of blur involves balancing several technical settings. The most important are shutter speed (or shutter angle), frame rate, and lens choice.
- Shutter speed/shutter angle: A 180-degree shutter angle at 24 frames per second (fps) is the cinematic standard, resulting in a shutter speed of 1/48 second. This produces a natural blur. Narrower shutter angles (e.g., 90 degrees) reduce blur, while wider angles (e.g., 270 degrees) increase it.
- Frame rate: Higher frame rates (like 60 fps or 120 fps) capture more detail and can reduce the perception of blur, making scenes appear hyper-real or even unnatural if not balanced with the right shutter speed.
- Camera movement: Fast pans, tilts, or handheld shots introduce additional blur. Stabilization tools can help control unwanted effects.
- Lens and aperture: While not directly responsible for blur, lens choice and aperture can affect depth of field, which in turn influences how motion is perceived in the frame.
Beginners can benefit from resources like the motion blur settings for beginners guide, which breaks down these technical aspects in detail.
Common Challenges and How to Solve Them
Working with motion blur can present several challenges, especially for those new to filmmaking. Here are some typical issues and practical solutions:
- Unwanted blur: If your footage looks too smeared, try increasing the shutter speed or narrowing the shutter angle. This will reduce the exposure time and minimize blur.
- Choppy or unnatural movement: If scenes appear too sharp or jittery, you may be using a shutter speed that’s too fast. Lower it to introduce more natural blur.
- Low light conditions: Slower shutter speeds are often necessary in dim environments, but this can increase blur. Use lighting, wider apertures, or higher ISO settings to compensate.
- Stabilization: Excessive camera shake can create distracting blur. Use tripods, gimbals, or in-camera stabilization features to keep shots steady when needed.
For a visual comparison of different approaches, the motion blur before and after examples guide can be a valuable reference.
Comparing Motion Blur in Film and Digital Video
The look and feel of motion blur can differ between traditional film and modern digital video. Film stock naturally produces a certain softness due to its chemical process, while digital sensors can render sharper images. As a result, digital filmmakers often need to pay extra attention to their camera settings to achieve a cinematic look.
Some digital cameras offer built-in motion blur simulation or post-processing effects to mimic the organic qualities of film. However, the most authentic results are still achieved by carefully controlling shutter speed and frame rate during shooting.
For a hands-on approach to capturing blur in both photography and video, you may find this comprehensive guide to capturing motion blur helpful.
Tips for Mastering Motion Blur in Your Projects
- Experiment with shutter speed: Try different settings to see how they affect the look of your footage.
- Use ND filters: Neutral density filters allow you to use slower shutter speeds in bright conditions without overexposing your image.
- Plan your shots: Storyboard or rehearse movements to ensure the right amount of blur is captured.
- Review and adjust: Always check your footage on set and make adjustments as needed.
- Study examples: Analyze films known for their creative use of blur to understand how professionals use this effect.
For further inspiration, the motion blur cinematic photography guide offers insights into both technical and creative aspects.
FAQ
How do I control motion blur when filming fast action scenes?
To manage blur during high-speed sequences, adjust your shutter speed or shutter angle. A faster shutter will reduce blur, making action clearer but potentially less natural. For a cinematic look, stick to the 180-degree rule (shutter speed is double the frame rate) and use lighting or ND filters to maintain proper exposure.
Can I add or reduce motion blur in post-production?
Yes, some editing software allows you to simulate or reduce blur after filming. However, results are often less convincing than capturing the effect in-camera. For best results, aim to achieve your desired look during production.
Why does my footage look jittery or unnatural?
This usually happens when the shutter speed is set too high, resulting in minimal blur and a staccato effect. Lowering the shutter speed or widening the shutter angle can restore a more natural appearance to movement.
Mastering motion blur in filmmaking is a blend of technical knowledge and creative experimentation. By understanding the principles and practicing with different settings, you can use this effect to enhance your storytelling and create visually compelling films.