Capturing motion blur through long exposure is a creative photography technique that transforms moving elements into smooth, flowing streaks of light or color. Whether you want to show the rush of city traffic, the flow of water, or the energy of a bustling street, mastering this approach can add a dynamic, artistic touch to your images. This guide will break down the essentials of a motion blur long exposure tutorial, covering camera settings, gear, and practical tips to help you achieve stunning results.
Before diving into the technical details, it’s helpful to see how other photographers use these techniques for inspiration. For a curated selection of creative approaches, check out motion blur composition examples to spark your imagination and set the stage for your own experiments.
Understanding Motion Blur and Long Exposure
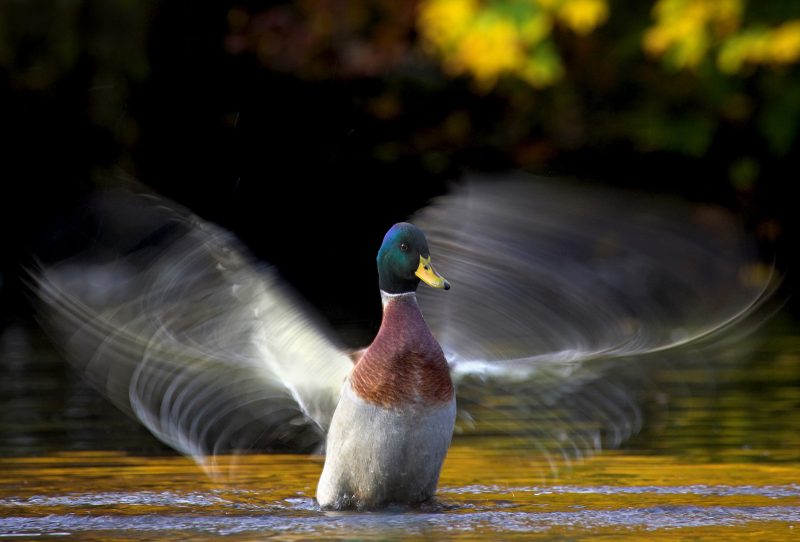
At its core, motion blur in photography is the visible streaking of moving objects in an image. This effect is achieved by using a long exposure, which means keeping the camera’s shutter open for an extended period. The longer the shutter remains open, the more movement is recorded, resulting in blurred motion while stationary objects remain sharp.
This technique is commonly used to:
- Show the movement of water in rivers, waterfalls, or oceans
- Capture light trails from vehicles at night
- Convey the hustle and bustle of crowds
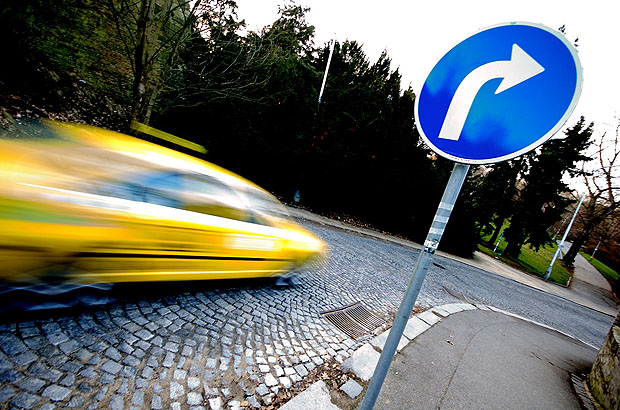
- Add a sense of speed or energy to sports and action shots
By adjusting exposure time, you can control how much blur appears in your image, giving you creative flexibility over the final result.
Essential Equipment for Capturing Motion Blur
While you don’t need the most expensive gear, a few essentials will make your long exposure shots much easier and more effective:
- Camera with Manual Controls: Any DSLR, mirrorless, or advanced compact camera that allows manual adjustment of shutter speed will work.
- Sturdy Tripod: To avoid unwanted camera shake, a tripod is crucial for sharp stationary elements.
- Remote Shutter Release or Self-Timer: Minimizes vibrations caused by pressing the shutter button.
- Neutral Density (ND) Filter: Reduces the amount of light entering the lens, allowing for longer exposures even in bright conditions.
Optional accessories include lens hoods to reduce flare and weather protection if shooting outdoors in challenging conditions.
Camera Settings for Motion Blur Effects
Getting the right settings is key to a successful motion blur long exposure tutorial experience. Here’s what to focus on:
- Shutter Speed: The most critical setting. For visible blur, start with 1/4 second and experiment up to several seconds or even minutes, depending on subject movement and available light.
- Aperture: A smaller aperture (higher f-number) increases depth of field and lets in less light, which can help achieve longer exposures.
- ISO: Keep ISO as low as possible (ISO 100 or 200) to minimize noise and allow for longer shutter speeds.
- Focus: Use manual focus to lock onto a stationary subject before starting your exposure, as autofocus may struggle in low light or with ND filters attached.
Always review your images and adjust settings as needed. If your photo is too bright, use a stronger ND filter or a smaller aperture. If it’s too dark, increase ISO slightly or use a wider aperture.
Creative Approaches to Motion Blur Photography
There are several ways to incorporate motion blur into your photography, each producing a distinct visual effect:
- Static Camera, Moving Subject: Place your camera on a tripod and let moving elements (like people, cars, or water) blur across the frame.
- Panning: Move the camera along with a moving subject during the exposure. This keeps the subject relatively sharp while blurring the background, emphasizing speed.
- Intentional Camera Movement (ICM): Deliberately move the camera during the exposure to create abstract patterns and painterly effects.
Experimenting with these techniques can yield a wide range of creative results. For more ideas and artistic inspiration, you might enjoy exploring motion blur creative inspiration from other artists.

Step-by-Step Workflow for Long Exposure Shots
Follow these steps for consistent results when working with motion blur and long exposure:
- Set up your camera on a tripod and compose your shot.
- Switch to manual mode or shutter priority mode.
- Attach an ND filter if shooting in bright conditions.
- Set a low ISO and adjust aperture for desired depth of field.
- Dial in your chosen shutter speed based on the amount of blur you want.
- Use manual focus to lock onto your subject.
- Trigger the shutter using a remote release or the self-timer to avoid shake.
- Review the image, check for sharpness in static areas, and adjust settings as needed.
Patience and experimentation are important. Try different shutter speeds and compositions until you achieve the effect that matches your vision.
Common Challenges and How to Solve Them
Even with careful planning, you may encounter some issues when working with motion blur long exposure techniques:
- Overexposed Images: Use a stronger ND filter, a smaller aperture, or shoot at times of day with less ambient light.
- Camera Shake: Always use a tripod and remote release. Enable your camera’s mirror lock-up function if available.
- Unwanted Moving Objects: Wait for the scene to clear or take multiple exposures to blend in post-processing.
- Focus Problems: Pre-focus before attaching ND filters, and use live view for precise manual focus.
For more technical tips and troubleshooting, the motion blur settings for beginners guide offers a deeper dive into camera setup and problem-solving.
Post-Processing Tips for Motion Blur Photos
Editing can enhance your long exposure images by improving contrast, color, and sharpness. Here are a few suggestions:
- Adjust Exposure and Contrast: Fine-tune highlights and shadows to add depth.
- Enhance Colors: Boost vibrancy to make blurred elements stand out.
- Sharpen Static Areas: Apply selective sharpening to non-moving parts for extra clarity.
- Remove Distractions: Use cloning or healing tools to clean up unwanted elements.
Remember to keep edits natural and avoid over-processing, which can introduce artifacts or noise.
If you’re interested in seeing how editing can transform your images, explore motion blur before and after examples for real-world comparisons.
Further Learning and Inspiration
To expand your knowledge, consider reading this comprehensive overview of motion blur techniques for additional tips and creative ideas. Studying the work of experienced photographers can also help you develop your own style and approach.
For a cinematic approach to this technique, the motion blur cinematic photography guide explores how to use these effects for storytelling and mood.
Frequently Asked Questions
What is the ideal shutter speed for motion blur in long exposure photography?
The best shutter speed depends on your subject and the effect you want. For gentle blur in moving water, try 1/4 to 2 seconds. For dramatic light trails or abstract effects, exposures of 10 seconds or longer may be needed. Experiment with different settings to find what works for your scene.
Do I need an ND filter for long exposure shots during the day?
Yes, in most daylight situations, an ND filter is essential. It reduces the amount of light entering the lens, allowing you to use slow shutter speeds without overexposing your image. The strength of the filter (measured in stops) will depend on how bright the conditions are and how long you want your exposure to be.
How can I keep stationary objects sharp while blurring motion?
Use a tripod to stabilize your camera and focus carefully on a stationary point. Keep ISO low and use a remote shutter release or self-timer to minimize vibrations. This ensures that only moving elements are blurred, while the rest of the scene remains crisp and clear.