

Motion blur is a creative effect in photography that captures the sense of movement within a still image. Rather than freezing a subject in sharp detail, motion blur intentionally allows moving elements to streak or blur across the frame. This technique can add energy, drama, and a dynamic feeling to photos, making them more visually engaging. Understanding how and why motion blur occurs, as well as how to control it, is essential for photographers looking to expand their creative toolkit.
Whether you’re interested in capturing the rush of city traffic, the flow of a waterfall, or the graceful motion of a dancer, learning to use motion blur effectively can transform ordinary scenes into compelling visual stories. If you want to see how different photographers use this technique, check out these motion blur composition examples for inspiration.
Understanding the Concept of Motion Blur
At its core, motion blur in photography refers to the streaking or blurring of moving objects within an image. This effect is caused when the camera’s shutter remains open long enough for the subject (or the camera itself) to move during the exposure. The result is a visible trail or blur that follows the path of the motion, conveying a sense of speed or movement.
Motion blur can occur both intentionally and unintentionally. While accidental blur is often seen as a mistake, controlled use of this effect can add emotion and narrative to a photo. For example, blurring the background while keeping a moving subject sharp (known as panning) can emphasize speed, while allowing the entire scene to blur can create abstract or artistic results.

How Motion Blur Happens: The Technical Side
The primary factor behind motion blur is shutter speed. When the shutter is open for a longer period, any movement—either from the subject or the camera—will be recorded as a blur. Here are the main elements that influence this effect:
- Shutter Speed: Slower shutter speeds (such as 1/30s, 1/10s, or even several seconds) allow more time for movement to be captured, resulting in more pronounced blur.
- Subject Movement: Faster-moving subjects will appear more blurred at the same shutter speed compared to slower subjects.
- Camera Movement: If the camera moves during the exposure, the entire scene may blur. This can be intentional (as in panning) or accidental (camera shake).
- Lighting Conditions: Low light often requires slower shutter speeds, increasing the likelihood of motion blur unless a tripod or stabilization is used.
Understanding these factors helps photographers control when and how blur appears in their images.
Creative Uses for Motion Blur in Photography
When used deliberately, motion blur can elevate a photo from a simple snapshot to a work of art. Here are some popular creative applications:
- Capturing Movement: Showcasing the motion of athletes, vehicles, or wildlife to convey energy and speed.
- Light Trails: Using long exposures at night to capture the trails of car headlights, fireworks, or city lights.
- Water Effects: Smoothing out waterfalls, rivers, or ocean waves for a dreamy, ethereal look.
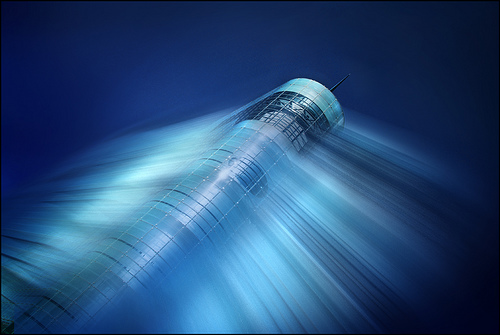
- Abstract Art: Moving the camera intentionally during exposure (a technique called ICM, or Intentional Camera Movement) to create painterly, abstract images.
- Panning: Following a moving subject with the camera during a slow exposure to keep the subject sharp while blurring the background.
For more inspiration on how artists use this technique, explore the motion blur creative inspiration guide.
How to Achieve Motion Blur: Practical Tips
To create effective motion blur, you need to control your camera settings and plan your shot. Here are some practical steps:
- Set a Slow Shutter Speed: Start with a shutter speed between 1/30s and several seconds, depending on the speed of your subject and the amount of blur you want.
- Use a Tripod: To avoid unwanted camera shake, especially for stationary backgrounds, use a tripod. This keeps static elements sharp while allowing moving subjects to blur.
- Experiment with Movement: Try photographing moving vehicles, flowing water, or people walking. Adjust your shutter speed to see how it affects the blur.
- Try Panning: Follow your subject with the camera during the exposure. This technique keeps the moving subject relatively sharp while blurring the background.
- Control Light: In bright conditions, use a low ISO, a small aperture (high f-number), or a neutral density (ND) filter to allow for longer exposures without overexposing the image.
Beginners can find more detailed advice in the motion blur settings for beginners guide, which breaks down settings and techniques for newcomers.
Common Mistakes and How to Avoid Them
While motion blur can be powerful, it’s easy to make mistakes that lead to disappointing results. Here are some pitfalls to watch out for:
- Unintentional Camera Shake: If you want only the subject to blur, use a tripod or image stabilization to keep the background sharp.
- Overexposure: Long exposures can let in too much light. Use ND filters or shoot in lower light to avoid blown-out highlights.
- Focusing Issues: Make sure your focus is on the right part of the scene, especially if you want some elements sharp.
- Too Much or Too Little Blur: Experiment with different shutter speeds to find the right balance for your creative vision.
For a visual comparison of results, see the motion blur before and after examples guide.
Comparing Motion Blur with Other Blur Techniques
It’s important to distinguish motion blur from other types of blur in photography:
- Depth of Field Blur (Bokeh): Caused by using a wide aperture, this blur affects areas outside the focus plane, not moving subjects.
- Out-of-Focus Blur: Happens when the subject or scene is not in focus, regardless of movement.
- Camera Shake: Unintentional blur from hand-holding the camera at slow shutter speeds, usually affecting the whole image.
Each type of blur serves a different creative purpose, and understanding the differences helps you choose the right technique for your goals.
Advanced Techniques and Inspiration
Once you’re comfortable with the basics, you can explore more advanced uses of motion blur:
- Multiple Exposures: Combine several exposures in-camera or in post-processing to layer different stages of movement.
- Intentional Camera Movement (ICM): Move the camera during a long exposure to create abstract patterns and textures.
- Combining Flash and Blur: Use a flash with a slow shutter speed to freeze part of the action while allowing the rest to blur.
For a deeper dive into cinematic approaches, the motion blur cinematic photography guide offers tips on using this effect for dramatic storytelling.
Resources for Mastering Motion Blur
If you want to further refine your skills, there are many resources available. For a comprehensive tutorial, visit this guide on mastering motion blur photography, which covers both technical and creative aspects.
Frequently Asked Questions
What camera settings are best for capturing motion blur?
To achieve motion blur, use a slow shutter speed (such as 1/30s or slower), keep your ISO as low as possible to avoid overexposure, and use a small aperture (high f-number) if shooting in bright light. A tripod is recommended for stability, especially if you want stationary elements to remain sharp.
How can I prevent unwanted blur in my photos?
If you want to avoid blur, use a faster shutter speed (such as 1/250s or faster), stabilize your camera with a tripod or image stabilization, and make sure your subject is well-lit. Proper focusing and holding the camera steady are also important.
Can motion blur be fixed in post-processing?
While minor blur can sometimes be reduced using sharpening tools in editing software, significant motion blur is difficult to correct after the fact. It’s best to get your settings right in-camera. However, creative blur can be enhanced or layered in post-processing for artistic effects.